Complete a Risk Lifecycle
This tutorial walks you through the full lifecycle of a risk — from creation to closure.
1. Create a manual risk
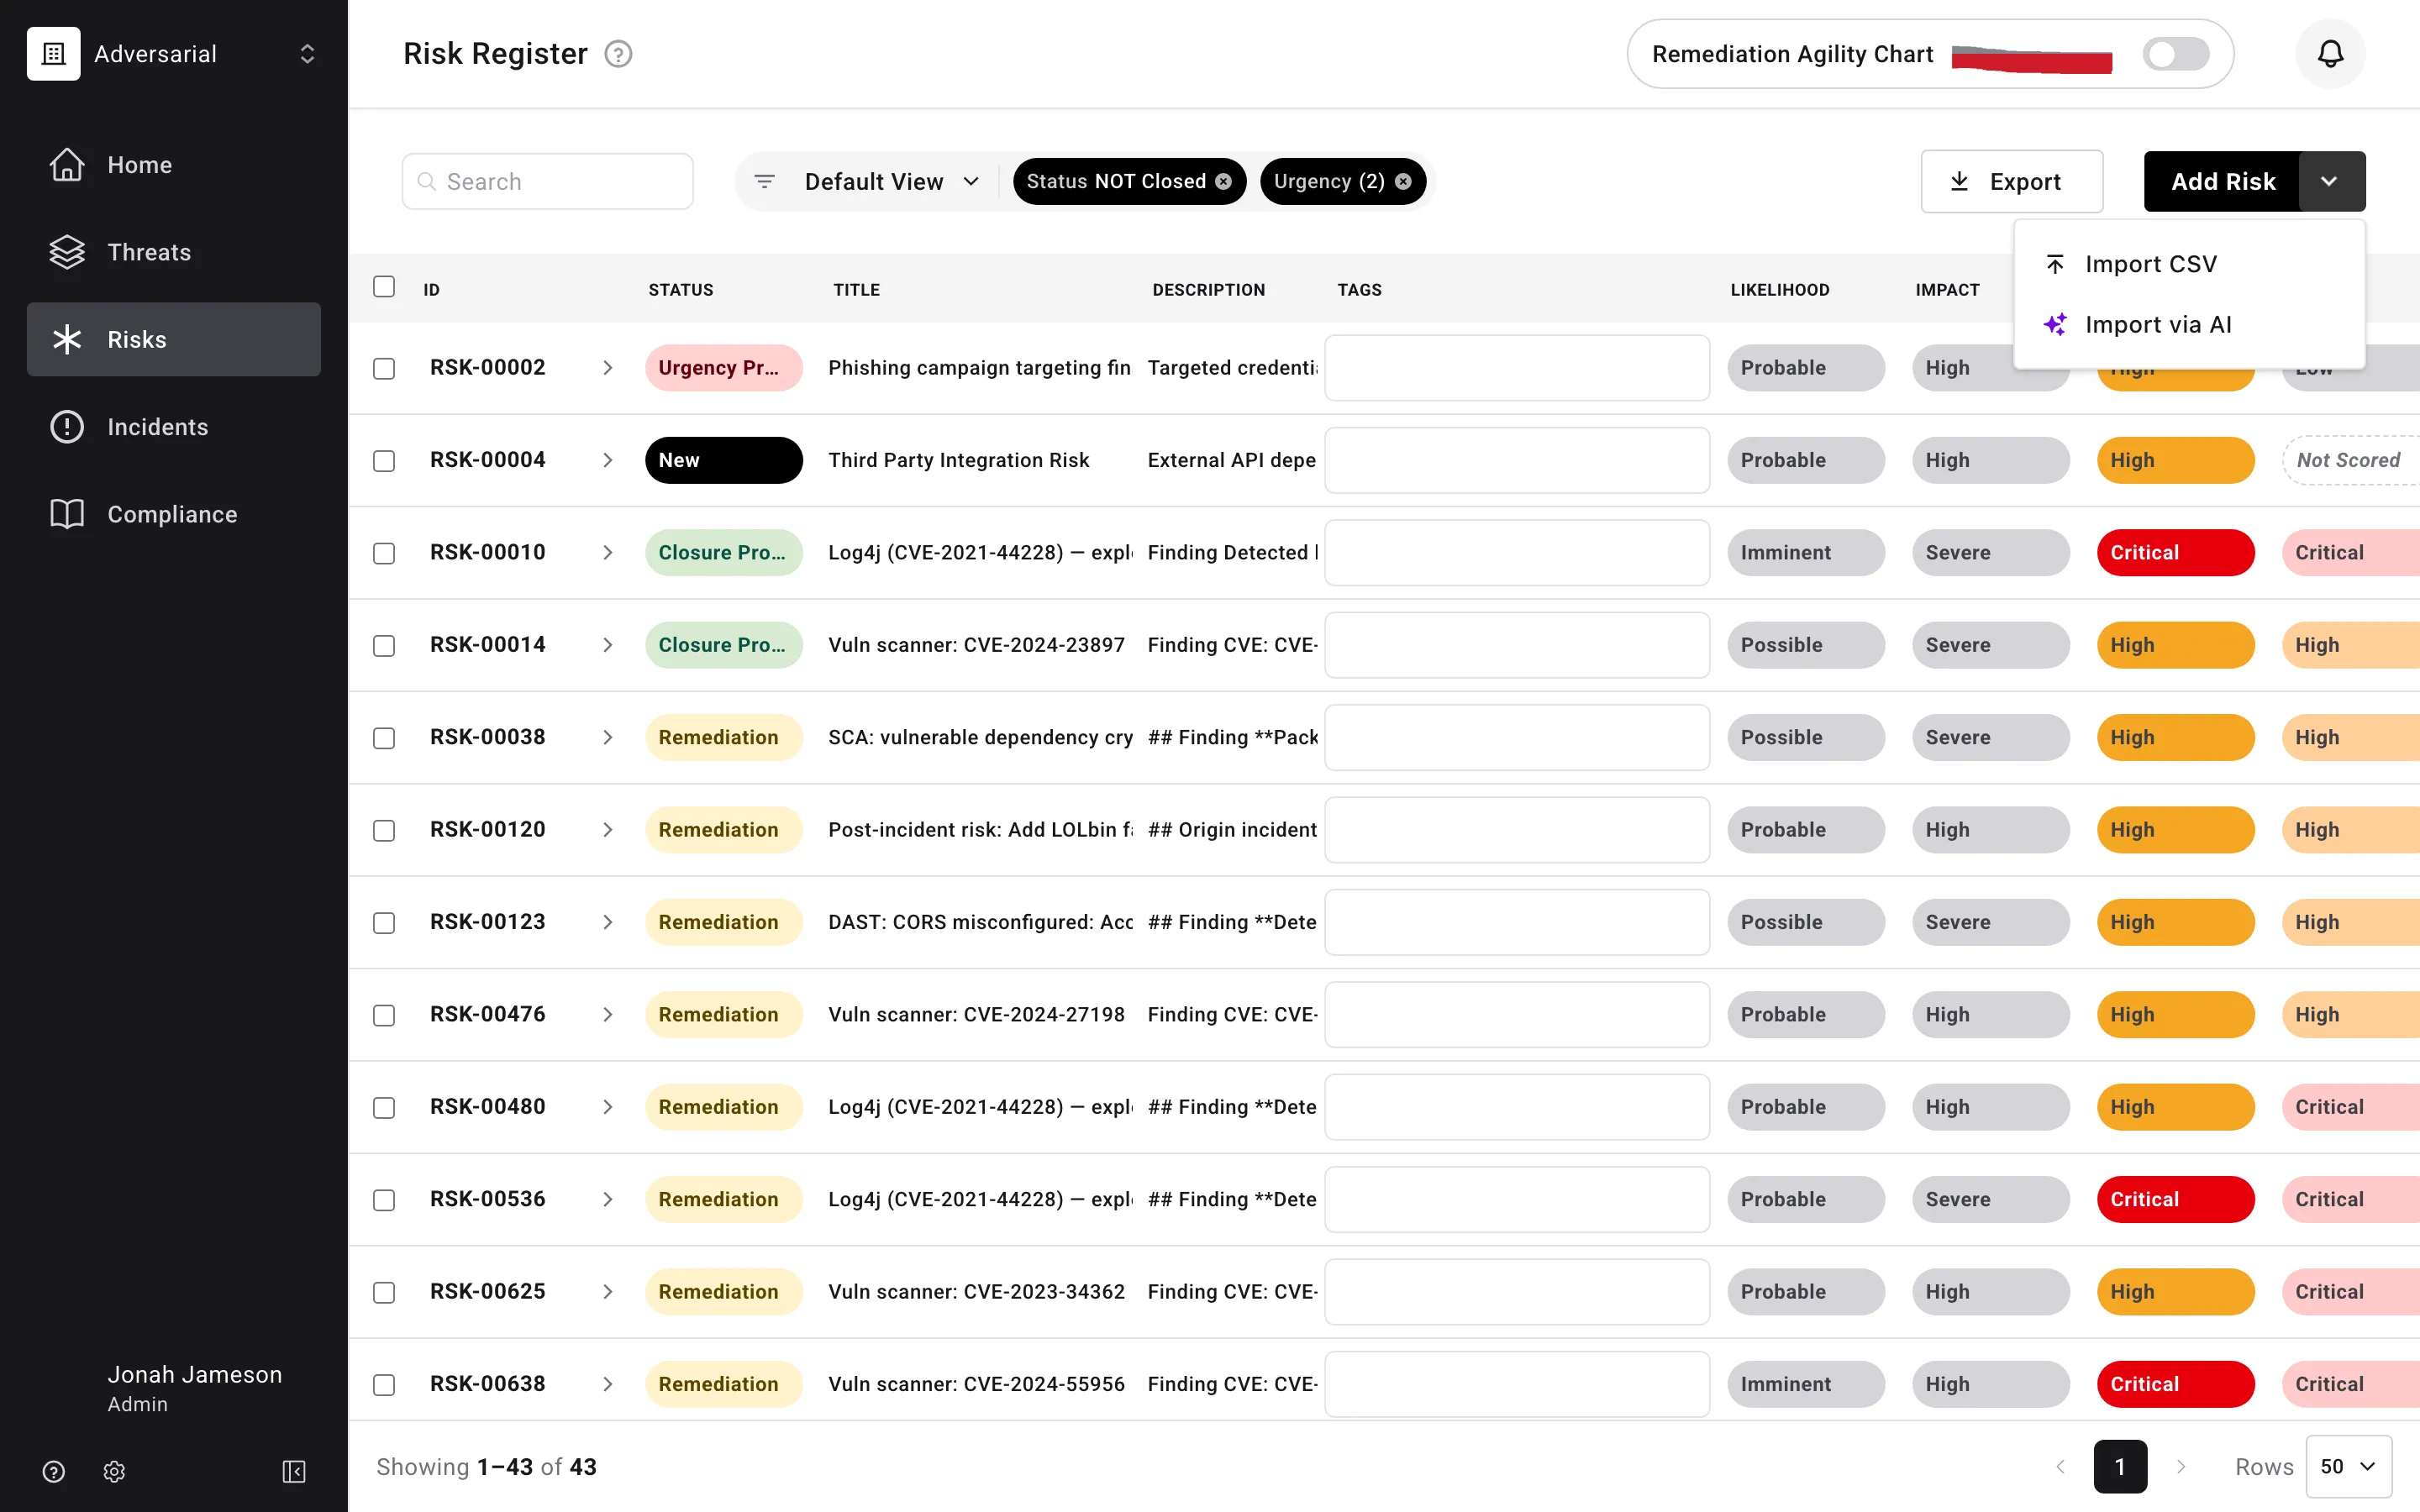
Section titled “1. Create a manual risk”Click the Add Risk button in the Risk Register. A new risk record appears at the top of your register. Populate the Title and Description fields with enough detail for accurate scoring. You can also use the dropdown to import risks in bulk from a CSV, or have AI extract them from an uploaded report with Import via AI. See Creating Risks for all creation methods.
2. Score with AI
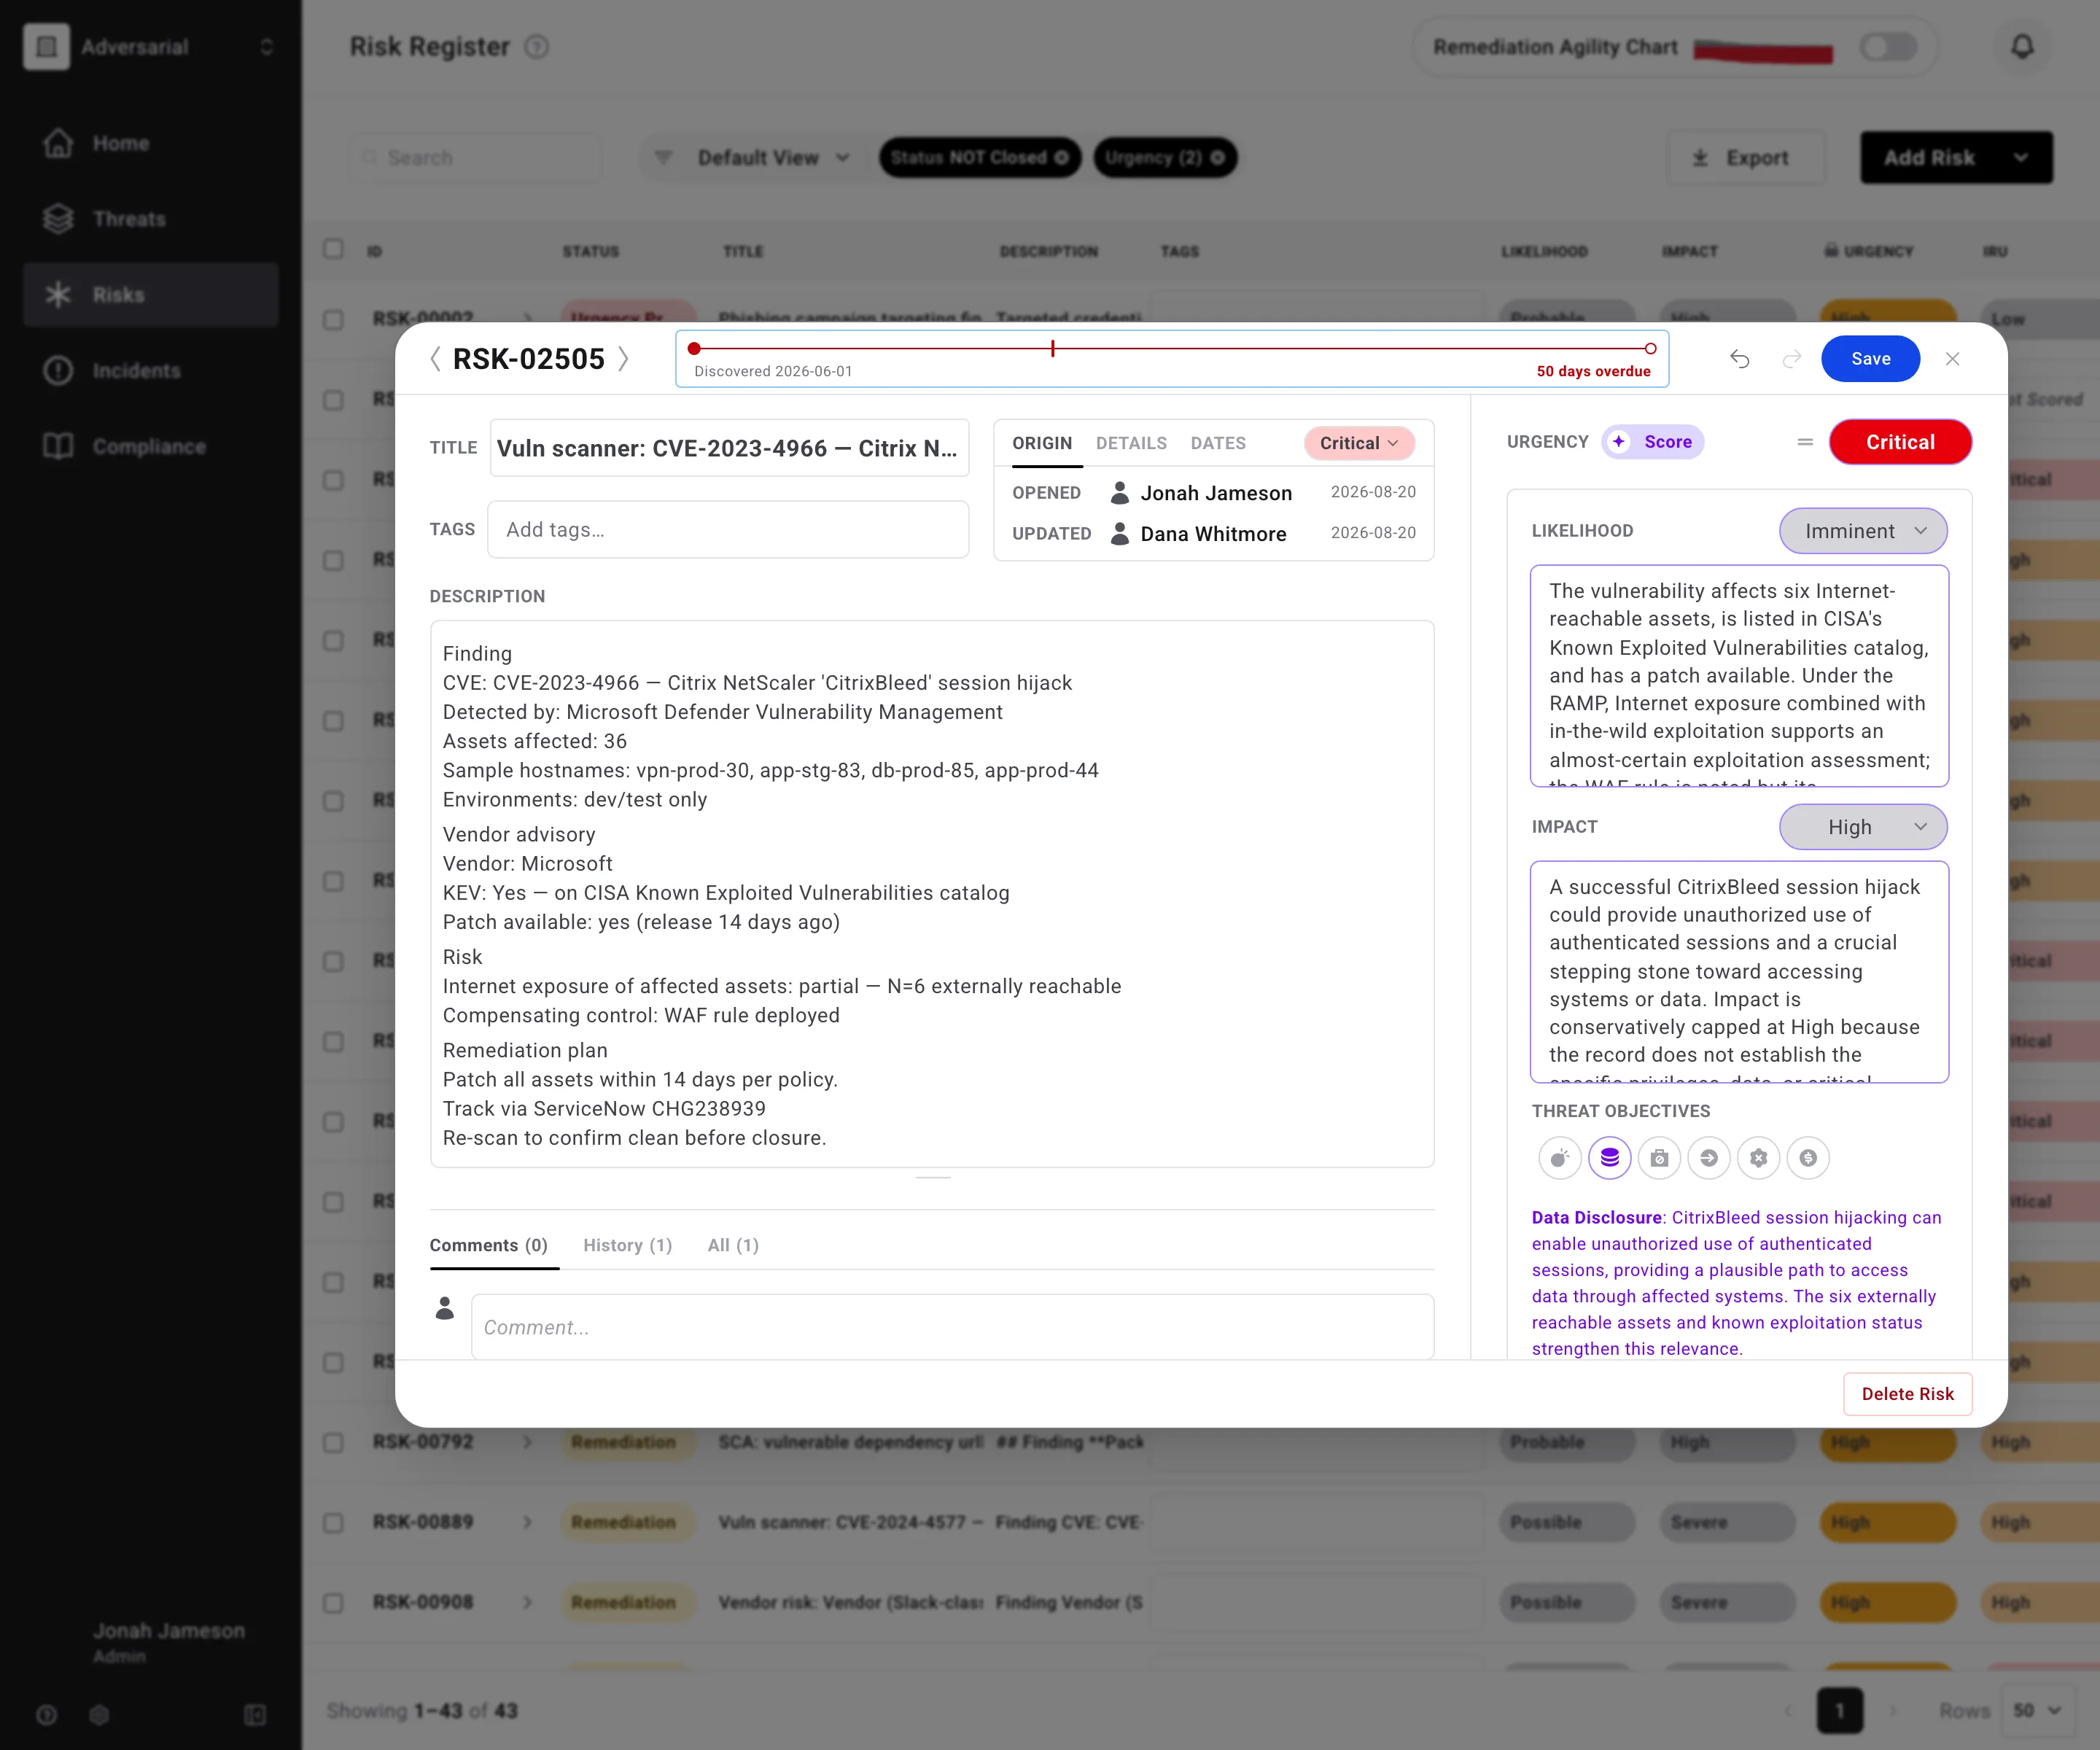
Section titled “2. Score with AI”Open the risk and click the Score button next to the Urgency label to have the platform assess the risk. The AI will:
- Assign Likelihood and Impact ratings.
- Assign relevant Threat Objectives, each at low or strong correlation.
- Record its reasoning alongside the Likelihood and Impact scores.
Review the proposed scores and reasoning, then click Save in the modal header to accept. See Scoring and Remediation for details on how AI scoring works.
3. Assign remediation
Section titled “3. Assign remediation”If your organization has a ticket integration configured (such as Jira or ServiceNow), create or link a ticket directly from the Tickets section under Remediation. Otherwise, use the Assignee field to assign the risk to a team member and document the remediation task in the Remediation Task field.
4. Track progress
Section titled “4. Track progress”As remediation work progresses, move the risk status through the lifecycle using the Status picker in the Remediation card:
- Remediation — Work is underway.
- Closure Proposed — Remediation is complete and awaiting validation.
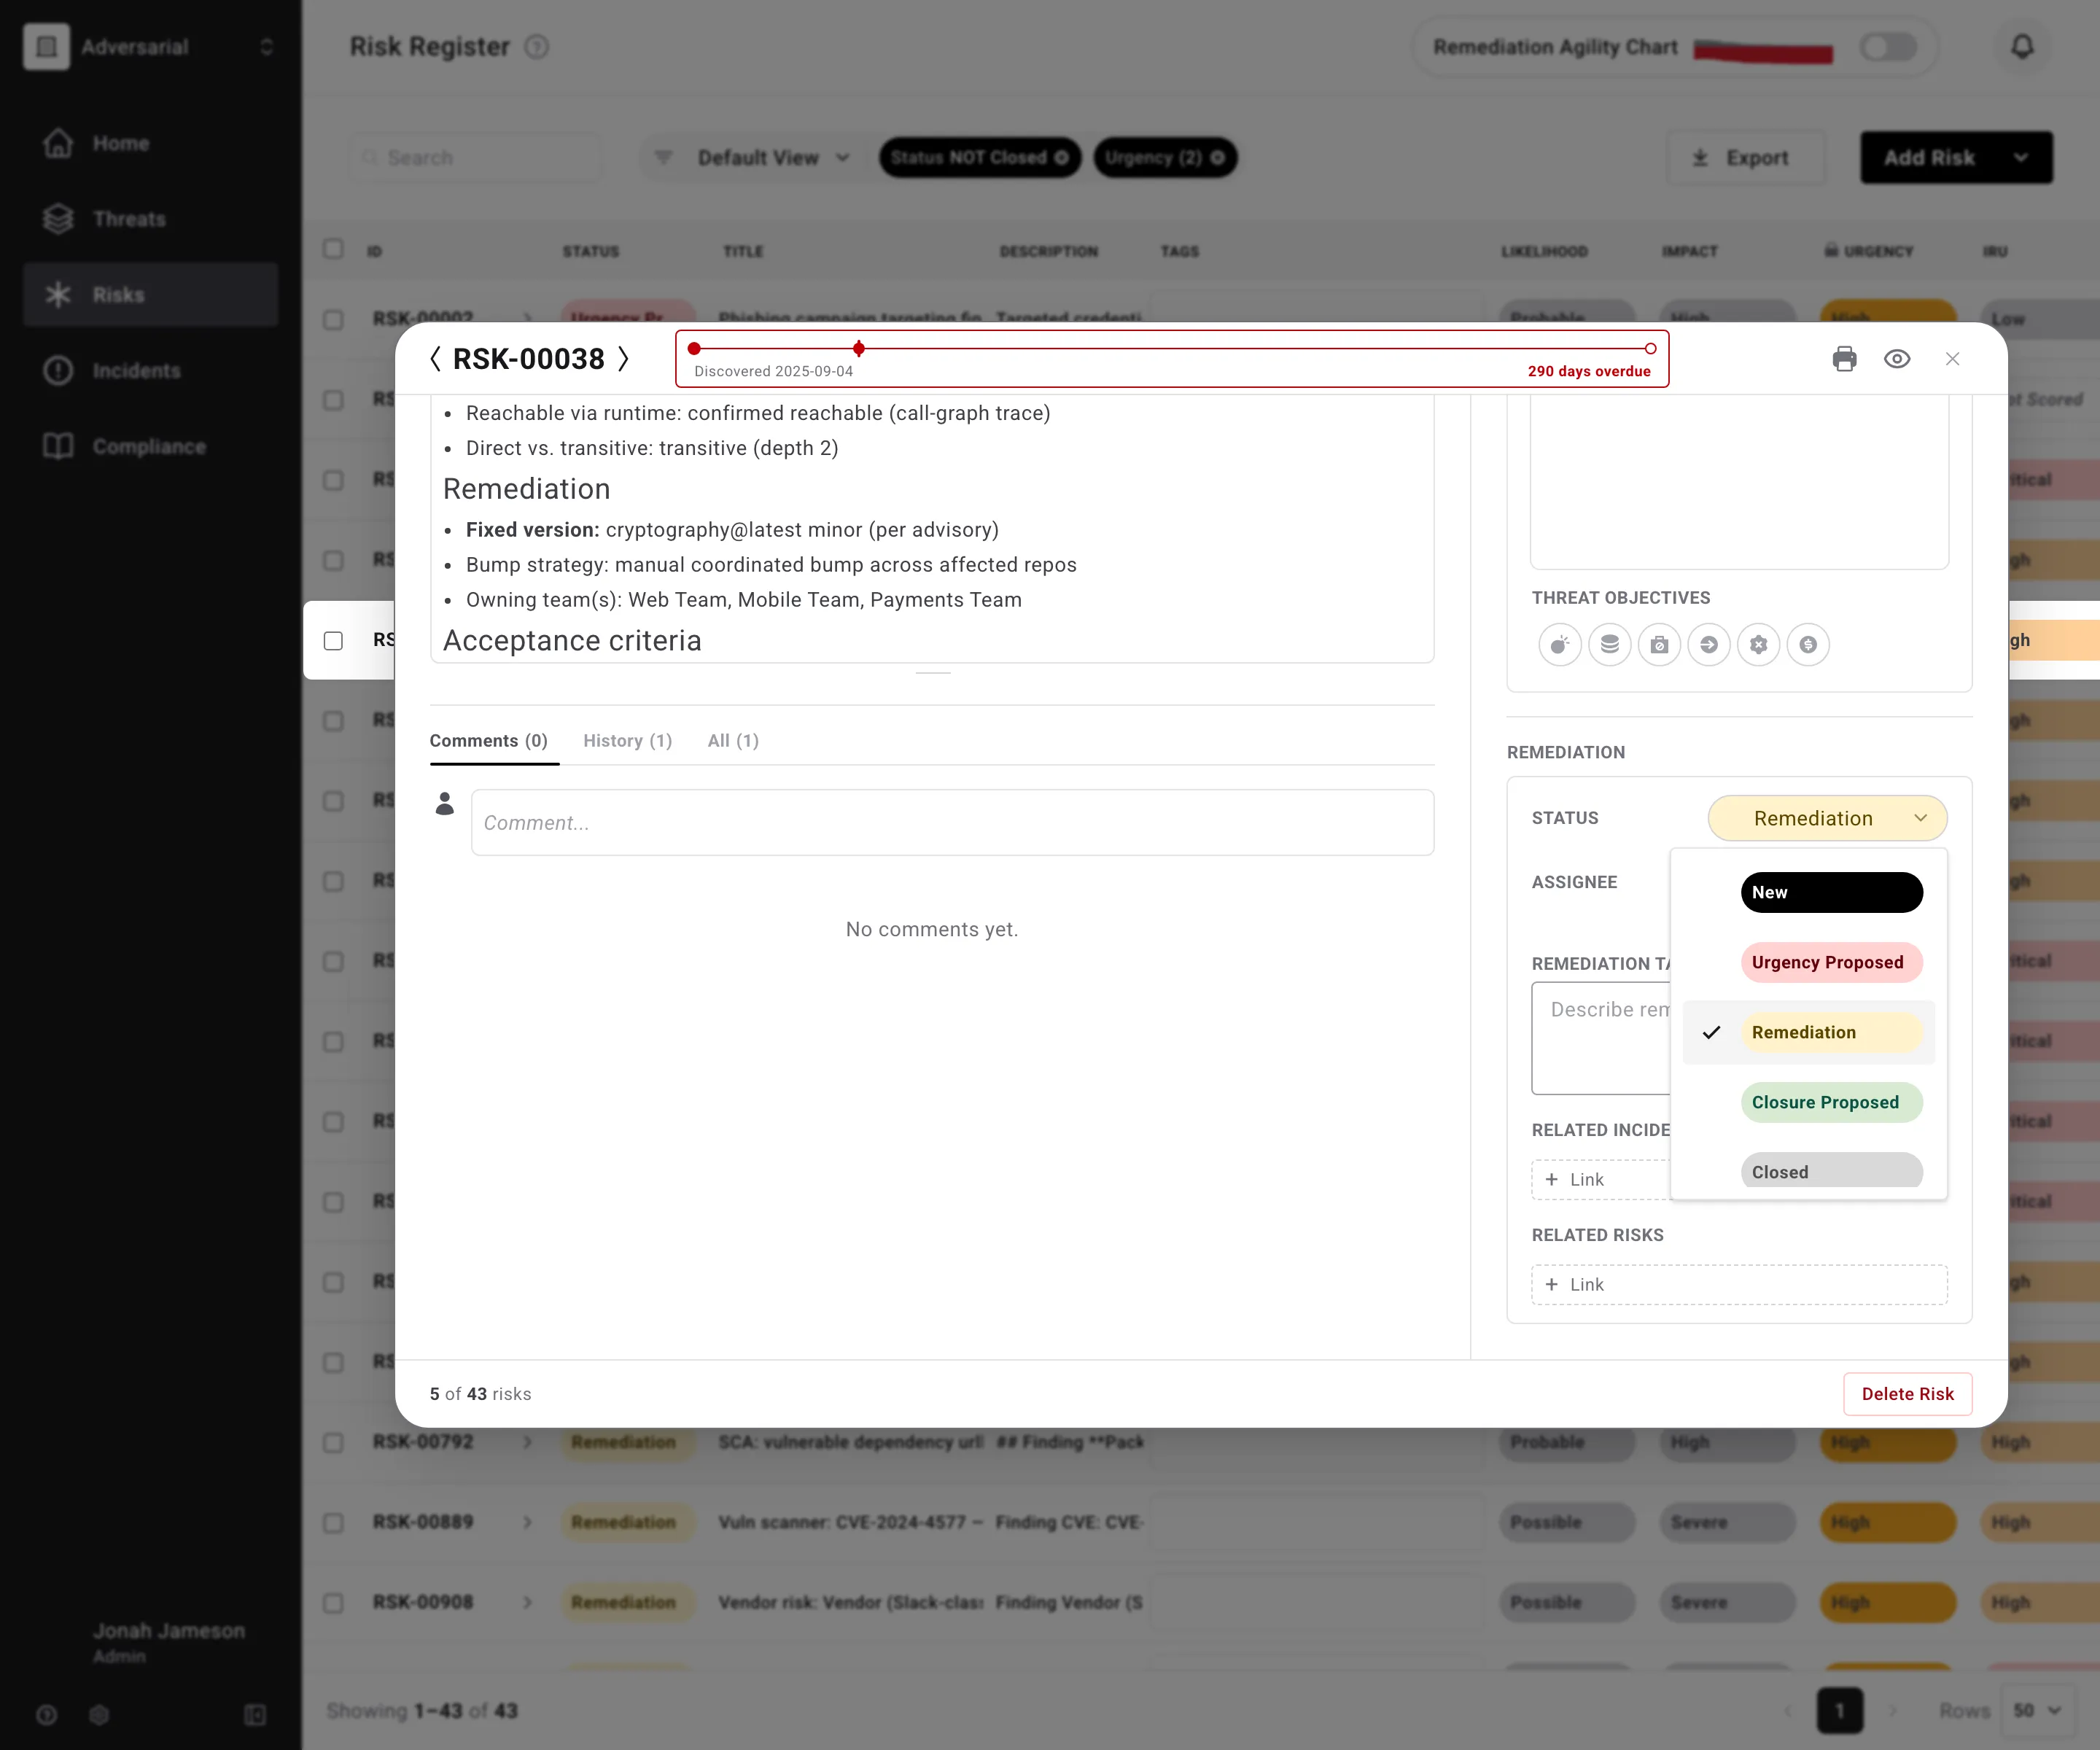
See Risk Fields — Status for all status definitions.
5. Close the risk
Section titled “5. Close the risk”Write a Control Statement documenting what was done to address the risk. Set the status to Closed. See Risk Fields — Control Statement for guidance on writing effective control statements.