MCP Server
The Adversarial MCP server lets you connect an AI assistant — Claude Code, Claude Desktop, or any Model Context Protocol client — directly to your organization’s risk and incident data. Once connected, the assistant can pull up risks, incidents, your threat profile, and your compliance procedures, and (with write access) score risks against your Risk Assessment Management Procedure (RAMP), triage incidents against your Cyber Incident Response Procedure (CIRP), assign threat objectives, tag items, leave comments, work with parent/child risk and incident hierarchies, and delete risks and incidents — all on your behalf.
Everything the assistant sees and does is scoped to your organization and bounded by your own permissions. The assistant can never read or change anything you couldn’t read or change yourself in the app.
Prerequisites
Section titled “Prerequisites”- An Adversarial account you can sign in to with your company single sign-on (the same login you use at app.adversarial.com).
- An MCP client that supports the streamable HTTP transport, such as Claude Code.
- Whatever roles your account already holds. The assistant inherits them — a Risk Editor can score and edit risks through the assistant; a Viewer can only read. See Roles & Permissions.
Connect with Claude Code
Section titled “Connect with Claude Code”The server lives at:
https://api.adversarial.com/mcp-
Add the server to Claude Code:
Terminal window claude mcp add --transport http adversarial https://api.adversarial.com/mcp -
Trigger authentication. Run
/mcpin Claude Code and choose to authenticate theadversarialserver (Claude Code also prompts you automatically the first time it needs the connection). -
Your browser opens to app.adversarial.com. Sign in with your usual single sign-on if you aren’t already.
-
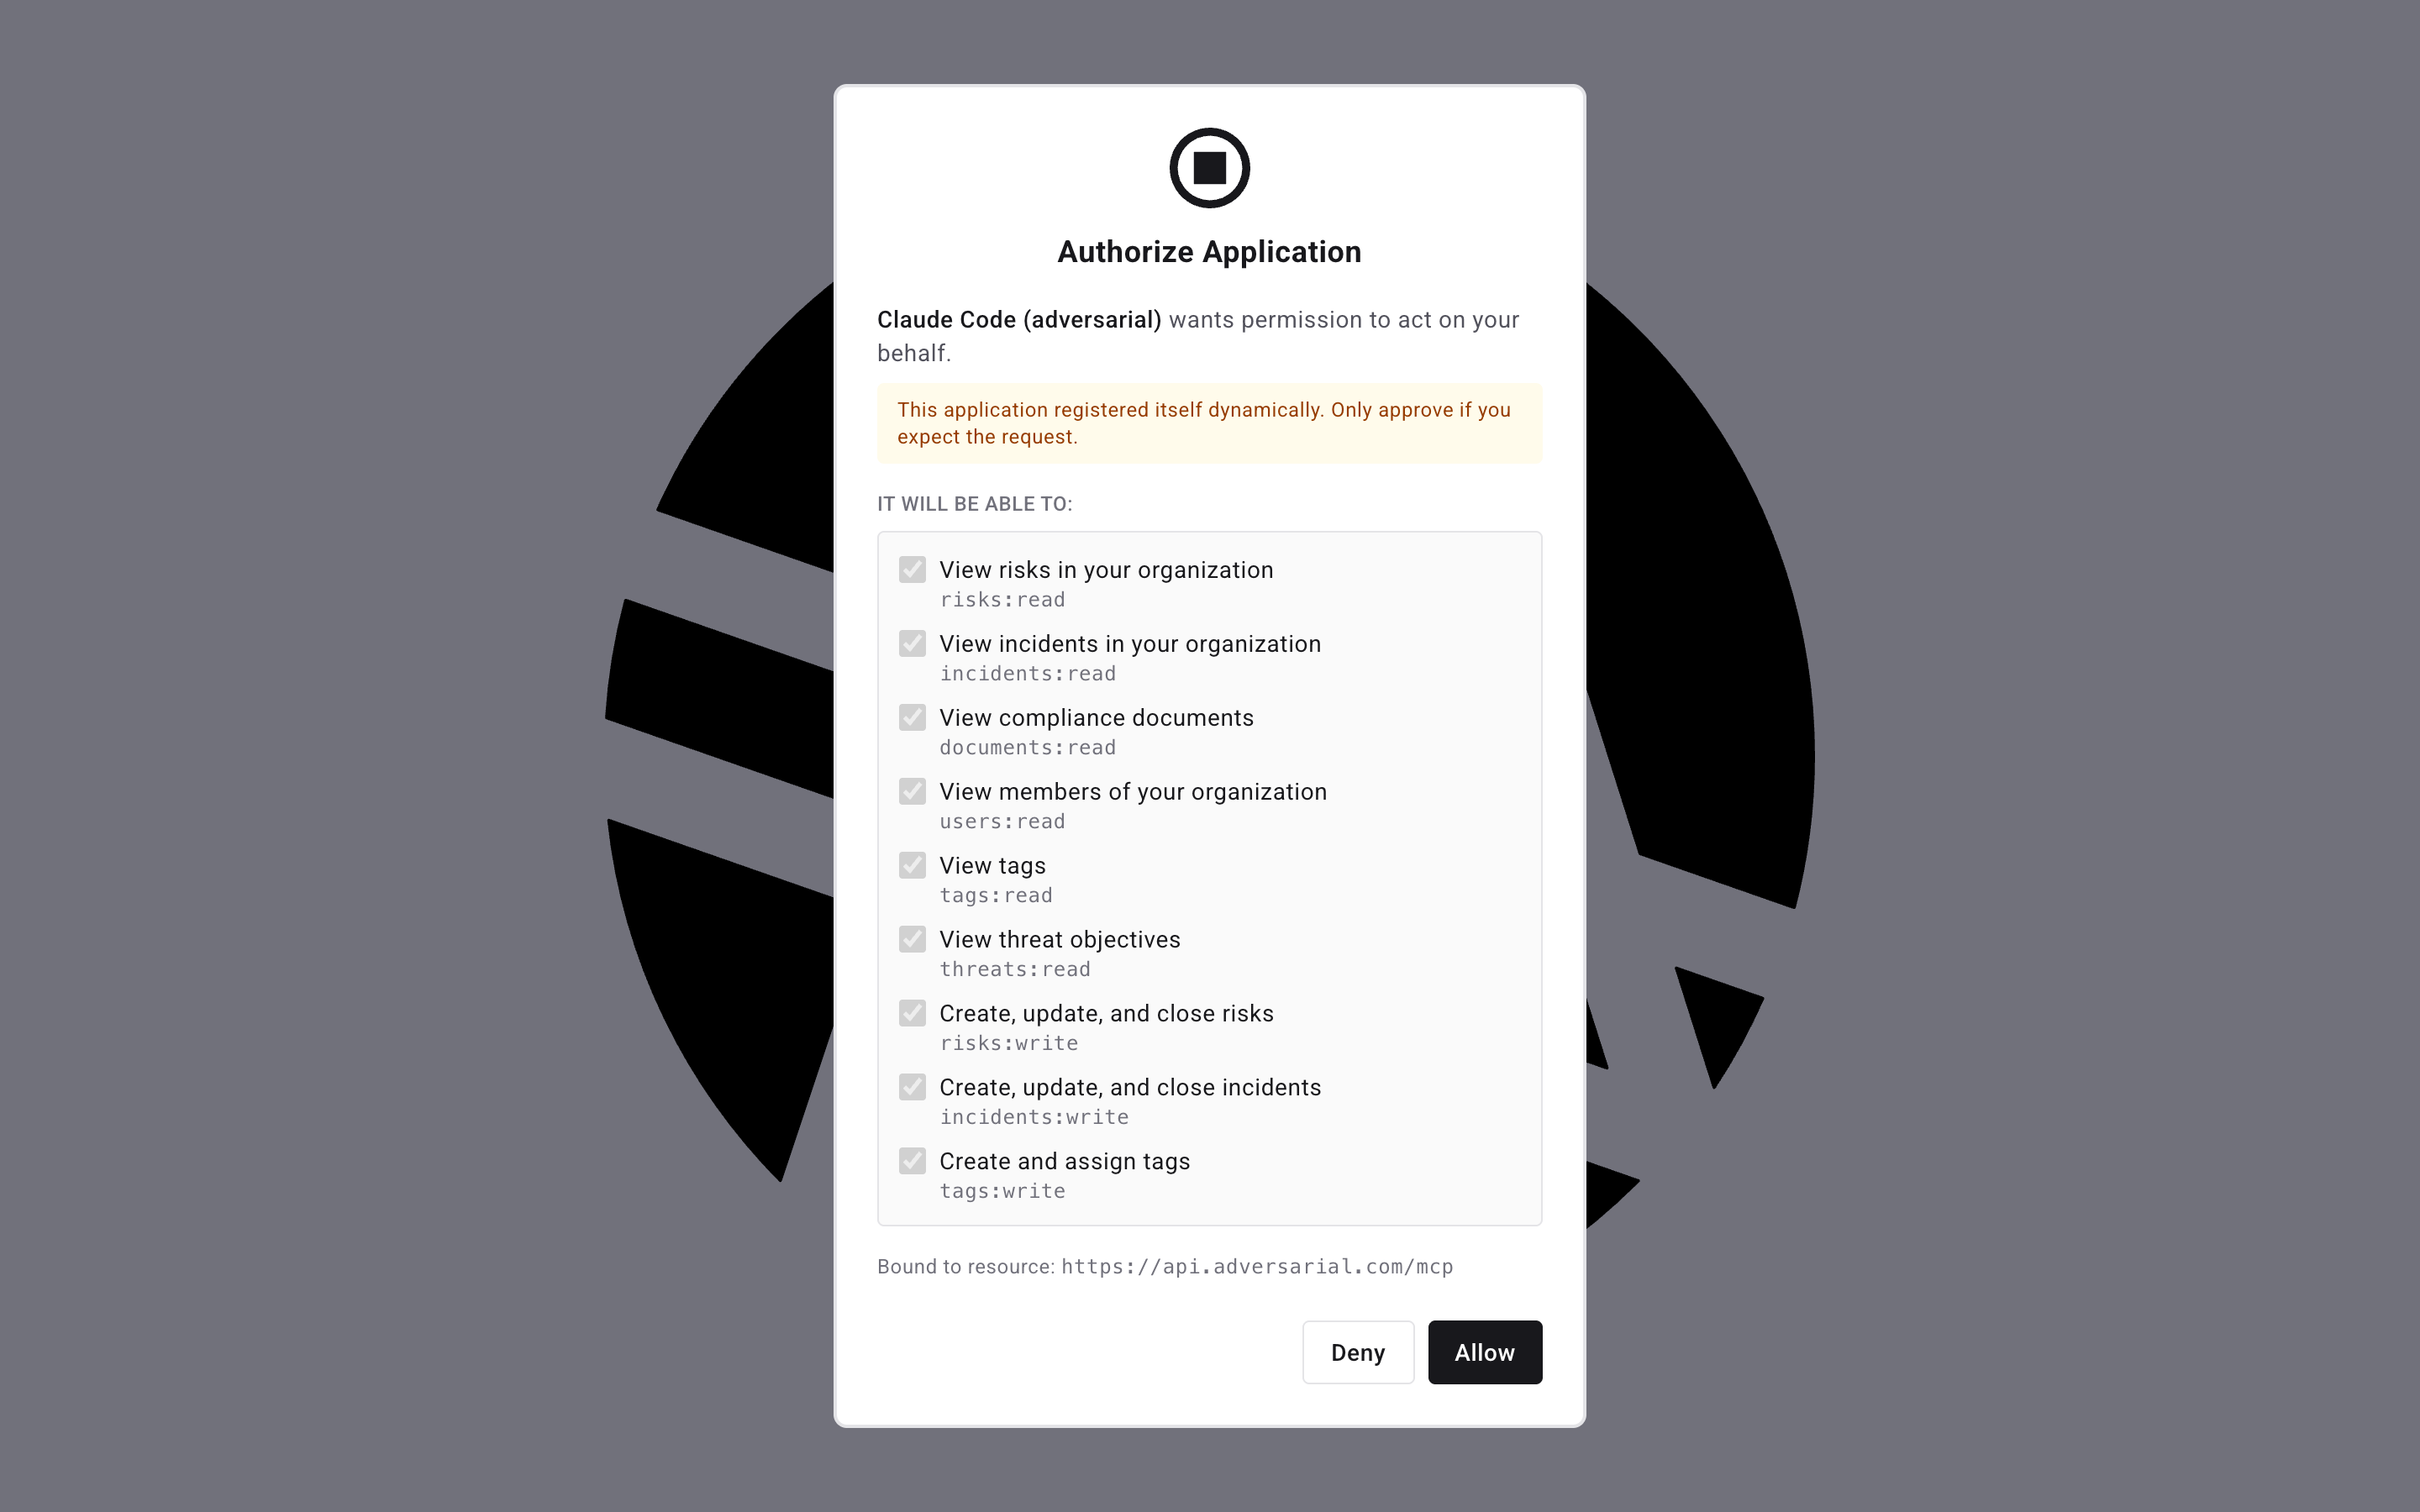
Review the consent screen. It lists exactly what the assistant is asking to do — for example View risks in your organization, Create, update, and close risks, View incidents in your organization. If your account belongs to more than one organization, the consent screen also lets you choose which organization the connection is authorized for, and the listed permissions adjust to match the role you hold there. Approve to connect, or deny to cancel.
-
You’re connected. Back in Claude Code, ask the assistant to
ping the adversarial serverto confirm — it replies with the account and organization it’s authenticated as. To see the permissions the connection holds, ask it directly at any time: “what can you do with the adversarial server?” or “what permissions do you have?”
Connect as a custom connector
Section titled “Connect as a custom connector”Most AI assistants let you add an MCP server through their own settings as a custom connector, without touching a command line. The flow is the same everywhere: paste the server URL, then complete the browser sign-in and consent. The server URL is always:
https://api.adversarial.com/mcpThe steps below differ only in where each assistant keeps its connector settings.
Claude
Section titled “Claude”In Claude.ai or Claude Desktop:
-
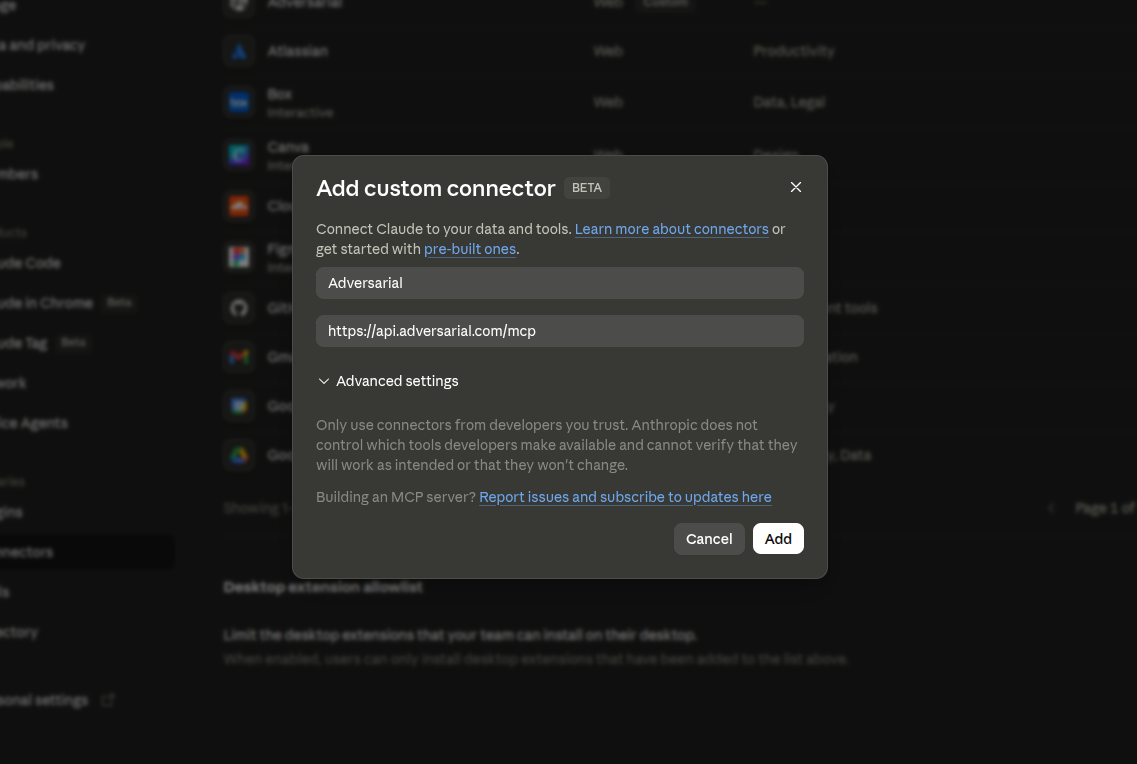
Go to Settings > Connectors and click Add custom connector.
-
Enter a name (for example,
Adversarial) and paste the server URL into the URL field. You can leave Advanced settings alone — those configure connectors that require a pre-registered OAuth client ID and secret, which Adversarial doesn’t need. -
Click Add. The connector appears on the Connectors page.
-
Open the new Adversarial connector and choose to connect. Your browser opens app.adversarial.com; sign in with your usual single sign-on if you aren’t already.
-
Review the consent screen — it lists exactly what the assistant is asking to do — and approve to connect.
Other MCP clients
Section titled “Other MCP clients”Any client that speaks the Model Context Protocol over streamable HTTP can connect. Point it at https://api.adversarial.com/mcp and start the connection — the client opens the same browser sign-in and consent flow, then discovers and registers itself automatically. No API key, client secret, or manual app registration is required for interactive use.
For headless automation (CI jobs, scheduled scripts, agents running without a person present to approve a browser prompt), use a service account instead — see Headless access with a service account below.
Access levels
Section titled “Access levels”When a client connects it requests one of two access levels. The consent screen expands these into human-readable permissions, so you see the areas you’re granting access to rather than a blanket label, and then intersects them with your current roles before issuing the token. Note that the risk and incident write permissions cover deleting records as well as creating and updating them, even though the consent line reads “Create, update, and close”.
| Access level | What the assistant can do |
|---|---|
Read-only (mcp) |
View risks, incidents, comments, your threat profile, tags, compliance documents, and team members. |
Read & write (mcp:full) |
Everything in read-only, plus create, edit, and delete risks and incidents, post comments, score and assign threat objectives, create tags, and manage parent/child record relationships. |
The permissions shown on the consent screen are always intersected with your current roles — if you approve read & write but your account only holds a Viewer role, the connection is silently narrowed to what a Viewer can actually do, and the token carries only those narrowed permissions. To see exactly what a connected session can do, ask the assistant directly.
How access is bounded
Section titled “How access is bounded”The connection is deliberately constrained on several axes:
- Your permissions. The assistant can never exceed what your roles allow. A request that needs a permission you don’t hold is refused.
- What you approved. It can only use the access you granted on the consent screen — nothing broader.
- One organization. Only data in the organization you selected on the consent screen is visible. Connecting a client to a different organization means going through consent again for that organization.
Role changes affect the two directions differently. If a role is removed, the connection loses those permissions immediately — every request is checked against your current roles. Gaining permissions requires reconnecting: the connection is capped at the scope granted on the consent screen, so disconnect and go through sign-in and consent again to pick up a new role. (Service-account connections instead pick up added roles on their next token, within about 15 minutes.) If you need to cut off access immediately, revoke it (below) — revocation takes effect at once.
Manage and revoke connected apps
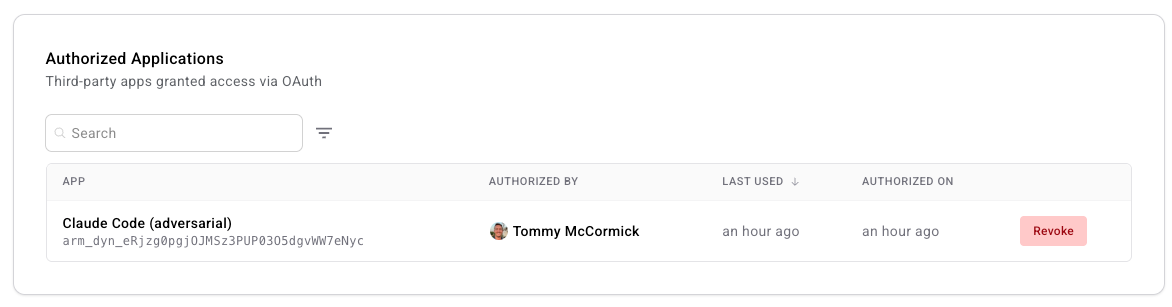
Section titled “Manage and revoke connected apps”Every assistant you connect appears under Settings > Team > Authorized Applications.
From there you can:
- See each connected application, when it was authorized, and (for admins) which member authorized it.
- Revoke any application. Revocation is immediate — the assistant stops working on its next request and must go through sign-in and consent again to reconnect.
Headless access with a service account
Section titled “Headless access with a service account”Interactive sign-in is fine for a person at a terminal, but unattended automation — a CI pipeline, a scheduled job, an agent running on a server — can’t open a browser. For those, connect with a service account instead. A service account authenticates with a client ID and secret, and the MCP endpoint accepts the bearer token it issues. The assistant can do whatever the service account’s roles allow.
-
Create a service account at Settings > Team and give it the roles matching the access you want — for example a risk-editor role to read and write risks. See Service Accounts.
-
Exchange its credentials for a token using the client-credentials flow against the token endpoint. The API Access guide has the exact request; access tokens last 15 minutes. For MCP, the exchange must also send
resource=https://api.adversarial.com/mcp— the MCP endpoint rejects tokens that weren’t minted for it. -
Pass the token to your client. For a short run, add the server with a static header:
Terminal window claude mcp add --transport http adversarial https://api.adversarial.com/mcp \--header "Authorization: Bearer $ACCESS_TOKEN"Because that token expires after 15 minutes, a static header only suits short jobs. For a durable connection, have the client mint a fresh token on every connection with a headers helper — a small script that runs the client-credentials exchange and prints the header as JSON. Point
.mcp.jsonat it:{"mcpServers": {"adversarial": {"type": "http","url": "https://api.adversarial.com/mcp","headersHelper": "/opt/adversarial/mcp-auth.sh"}}}Claude Code runs the helper fresh each time it connects or reconnects, so the assistant always presents a current token. The script just needs to print a JSON object of headers to standard output:
#!/usr/bin/env bashtoken=$(curl -fsS -X POST https://api.adversarial.com/api/v1/oauth/token \-d grant_type=client_credentials \-d client_id="$ADVERSARIAL_CLIENT_ID" \-d client_secret="$ADVERSARIAL_CLIENT_SECRET" \-d resource=https://api.adversarial.com/mcp | jq -r .access_token)printf '{"Authorization": "Bearer %s"}' "$token"
Next steps
Section titled “Next steps”- Tools & Workflows — what the assistant can do, and example scoring and triage workflows.
- Service Accounts — credentials for headless automation.
- AI Features — how Adversarial uses AI for scoring and reporting inside the platform.