Creating Risks
You can create risks in the Adversarial platform through API integrations, by adding a single risk manually, in bulk via CSV import, or by having AI extract them from a narrative document.
API Integrations
Section titled “API Integrations”Any risks that come in from your integrated tools will automatically display in your risk register, ensuring seamless and up-to-date tracking.
Manual Entry
Section titled “Manual Entry”Click the Add Risk button and a new risk record will appear at the top of your register. From there, populate all the relevant details.
CSV Import
Section titled “CSV Import”To bulk-create risks, click the dropdown menu next to the Add Risk button and choose Import CSV. In the import window, you will find a downloadable risk template with all the necessary field headers. Fill it out, save the file as a CSV, and upload it in the Import a CSV section. Once you select Import, your risks will be created in bulk and ready for review in the risk register.
CSV Field Reference
Section titled “CSV Field Reference”| Field Label | Format | Notes |
|---|---|---|
| title | Text field | No character limitation |
| description | Text field | No character limitation |
| status | Dropdown field | Case sensitive; view the CSV download template for available default values |
| likelihood | Dropdown field | Case sensitive; see the Likelihood table in Risk Fields |
| impact | Dropdown field | Case sensitive; see the Impact table in Risk Fields |
| source | Dropdown field | Case sensitive; view the CSV download template for available default values |
| type | Dropdown field | Case sensitive; view the CSV download template for available default values |
| closed_date | YYYY-MM-DD | Populate for risks that are closed |
| discovered_date | YYYY-MM-DD | Date the risk was discovered |
| expected_date | YYYY-MM-DD | For risks with a planned completion date different from the assigned due date; optional |
| initially_reported_urgency | Dropdown field | Case sensitive; view the CSV download template for available default values |
| control_statement | Text field | No character limitation |
| remediation_task | Text field | No character limitation |
| likelihood_reasoning | Text field | Reasoning shown alongside the Likelihood score; the column may also be named likelihood_analysis |
| impact_reasoning | Text field | Reasoning shown alongside the Impact score; the column may also be named impact_analysis |
| threat_objectives | Text field | Comma-separated threat objective names (e.g. Sabotage, Data Disclosure); matched case-insensitively and assigned at strong correlation |
The downloadable template covers the most common columns. Control Statement, the Likelihood and Impact reasoning columns, and Threat Objectives are also accepted on import — add those headers to the file yourself if you need them.
Once the file is populated with the appropriate risk data, save it as a CSV file type before uploading.
Import via AI
Section titled “Import via AI”To import risks from a narrative document — a pen-test report, an audit memo, a vendor assessment — click the dropdown menu next to the Add Risk button and choose Import via AI. Upload a text, Markdown, PDF (with selectable text), or Word (.docx) document, and the AI proposes a set of candidate risks drawn from it.
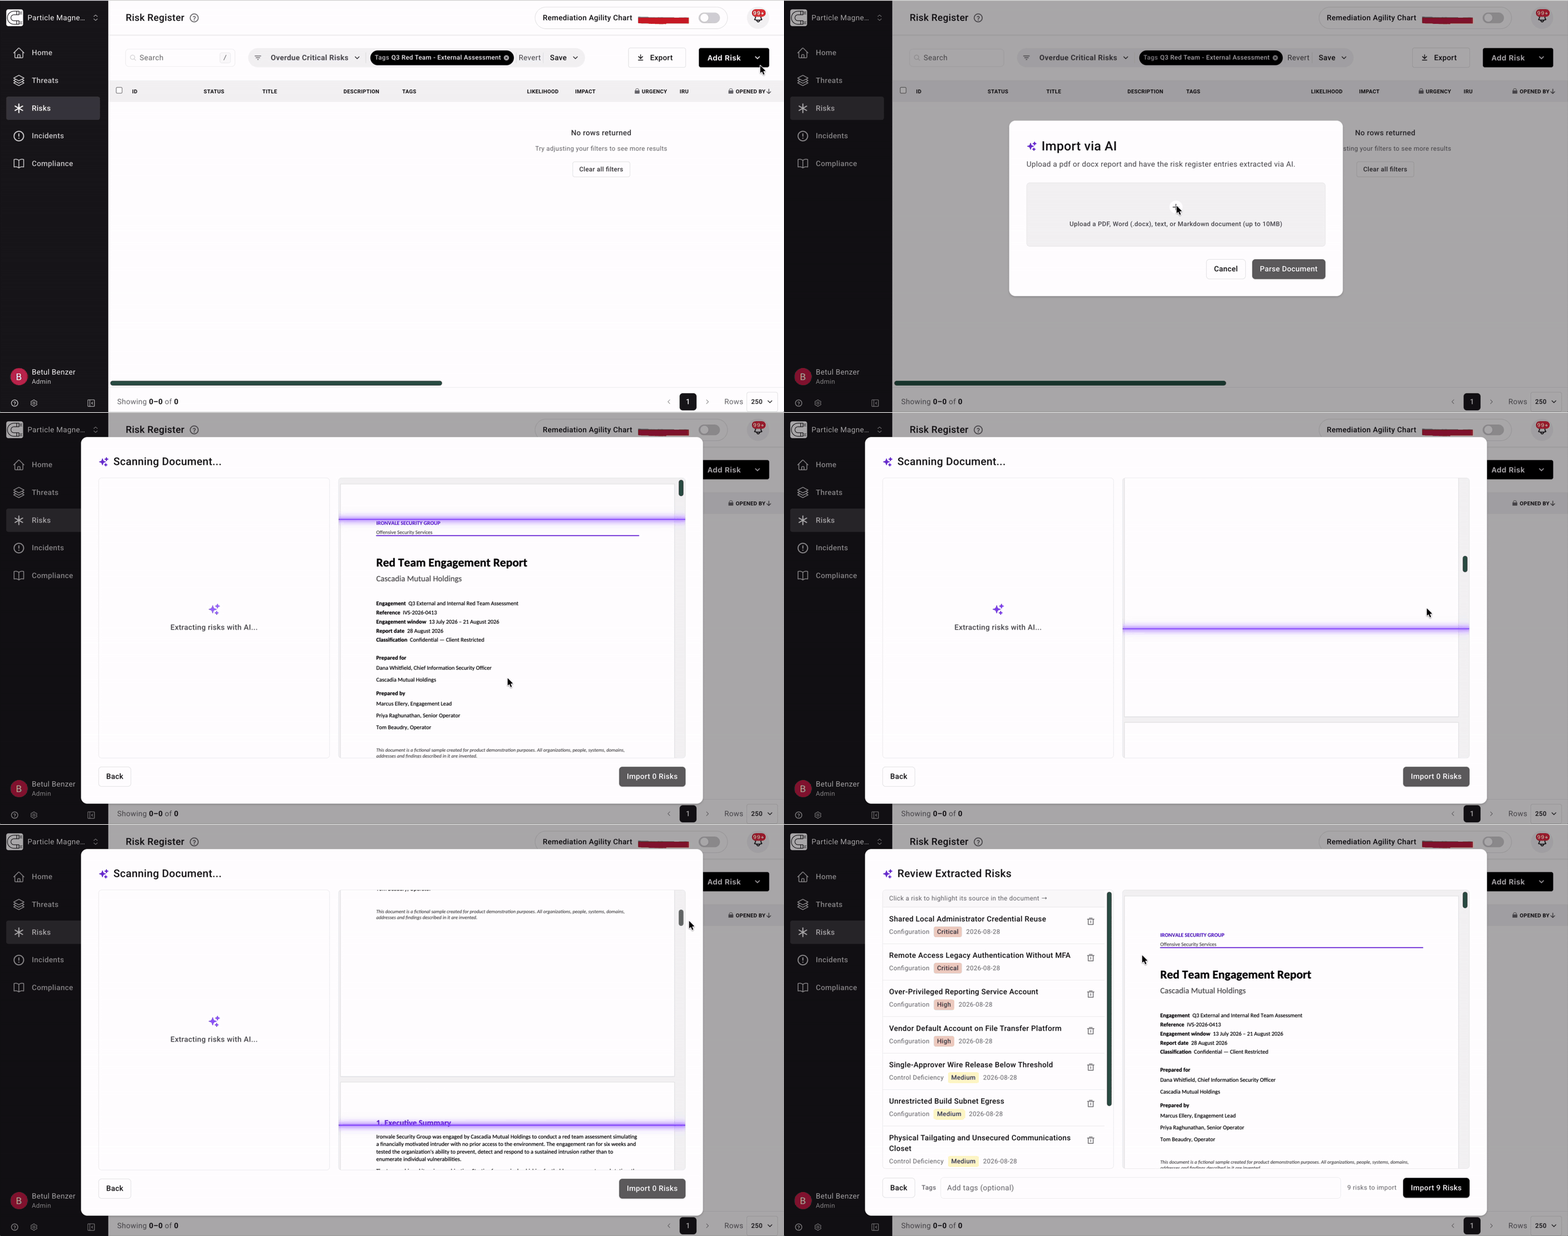
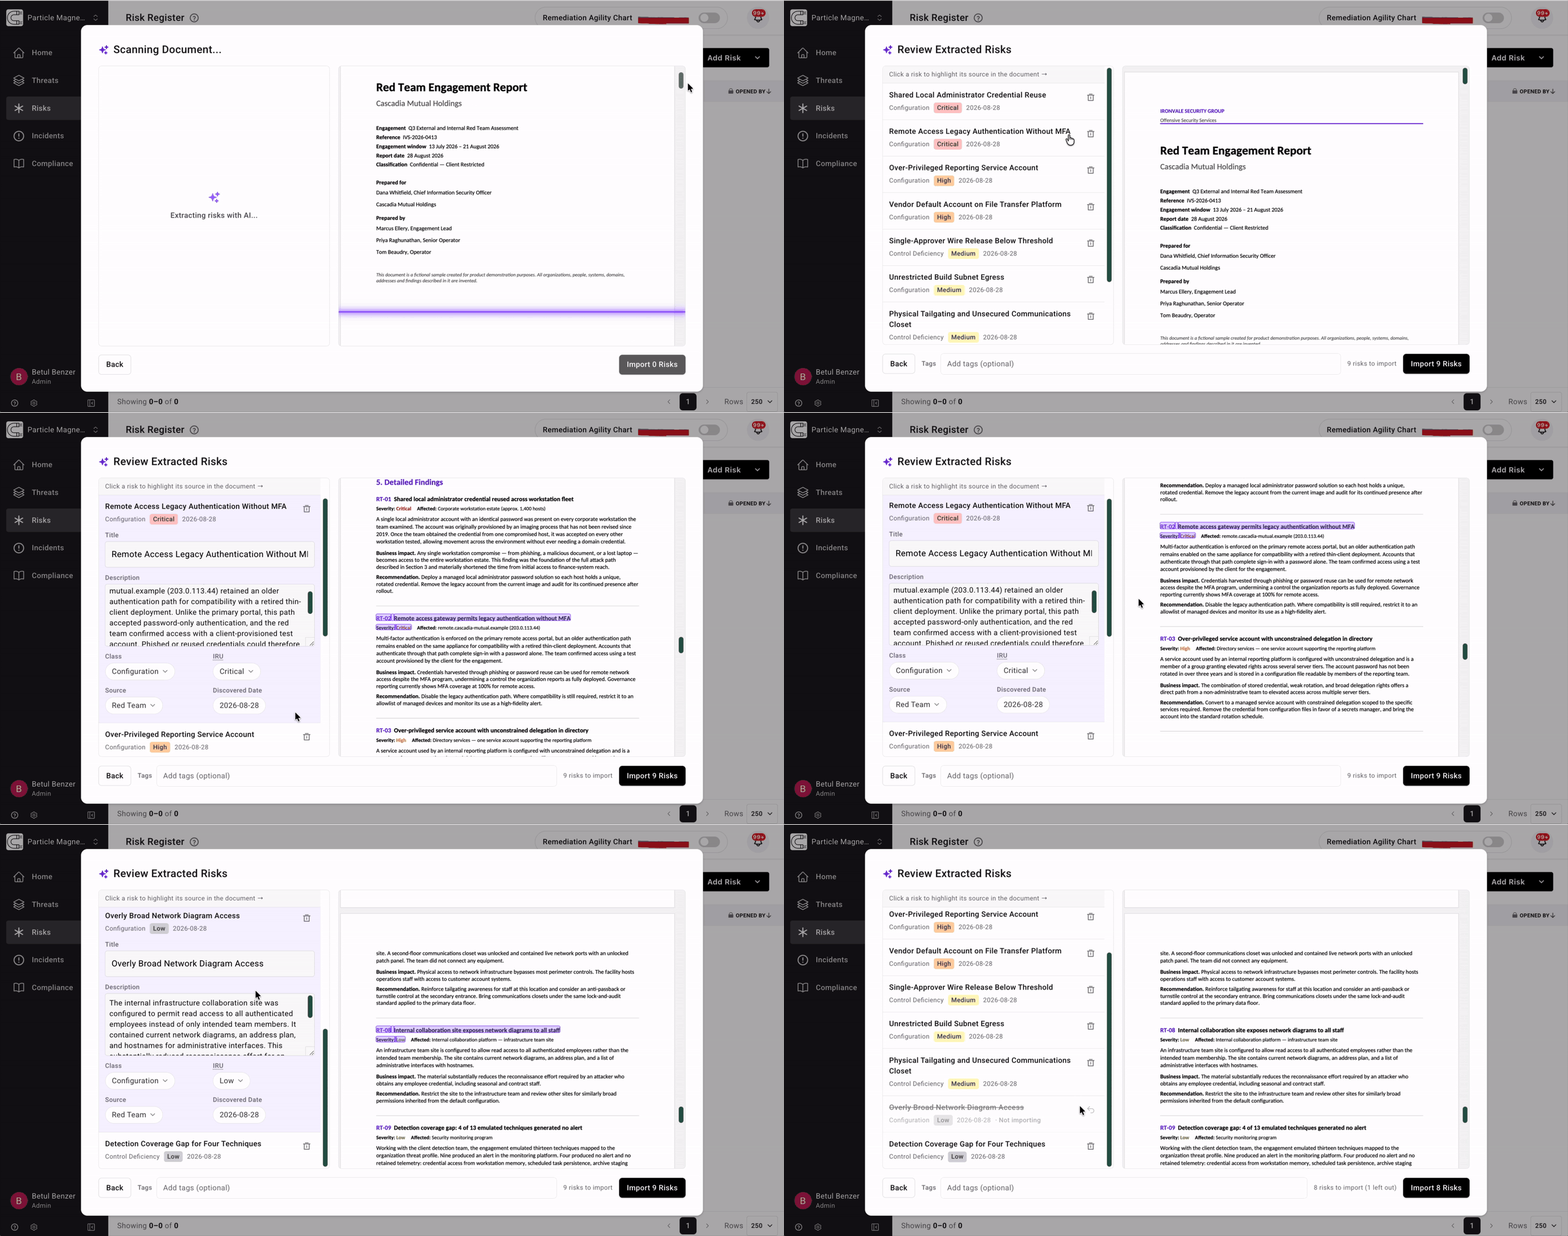
Each proposal is shown side-by-side with the source document: click a proposed risk to highlight the exact passage it was drawn from, and edit its Title, Description, Class, IRU, Source, or Discovered Date before importing. Discard any proposals you don’t want — a discarded row stays visible and can be restored — and optionally tag the whole batch, for example with the engagement or report name. Only the risks you approve are added to the register when you select Import; nothing is committed automatically. See AI Features for how AI is used across the platform.
Uploads are limited to 10 MB, and an exceptionally long document is truncated before parsing — so findings at the very end of a several-hundred-page report may not be proposed. Splitting a large report into its findings sections avoids this.
The import is all-or-nothing: if any part of it fails, no risks are created and no tags are applied, so a half-imported report never lands in the register. The risks you approve appear at the top of the register as soon as the import completes — even if your active filters would otherwise exclude them — in the New status and unscored, ready to be scored like any other new risk.
The document you uploaded is attached to every risk created from it, so the original report is in each risk’s Attachments section — see Risk Fields — Attachments. If the document can’t be attached, the risks are still imported and you are told that the attachment wasn’t added.
Importing this way requires permission to both create risks and manage tags: risks:write and tags:write. Among the built-in roles that means Admin, Editor, and Risk Editor — see Managing Roles.
Bulk Delete
Section titled “Bulk Delete”To delete multiple risks at once, select the risks using the checkboxes in the table view, then click the Delete button in the bulk actions toolbar. A confirmation dialog will appear before the risks are permanently removed.
Risk and Incident Linking
Section titled “Risk and Incident Linking”Risks and incidents can be linked to track relationships between them. From the detailed view of a risk, use the Related Incidents section to associate related incidents. This helps maintain traceability between risks and the incidents they may have caused or been identified through.