Set Up Your Adversarial Tenant
This tutorial walks you through setting up your Adversarial tenant, from your first login to generating your first governance report.
1. First-time login and organization onboarding
Section titled “1. First-time login and organization onboarding”Log in at app.adversarial.com with your Google or Microsoft work account. If your account doesn’t belong to an organization yet, the Organization Setup screen walks you through accepting a pending invitation or creating your organization — Getting Started covers that flow step by step, including the organization name and URL choices.
Once you’re in your organization, continue below.
2. Configure company settings
Section titled “2. Configure company settings”Navigate to Settings > Company in the sidebar to configure your organization’s profile.
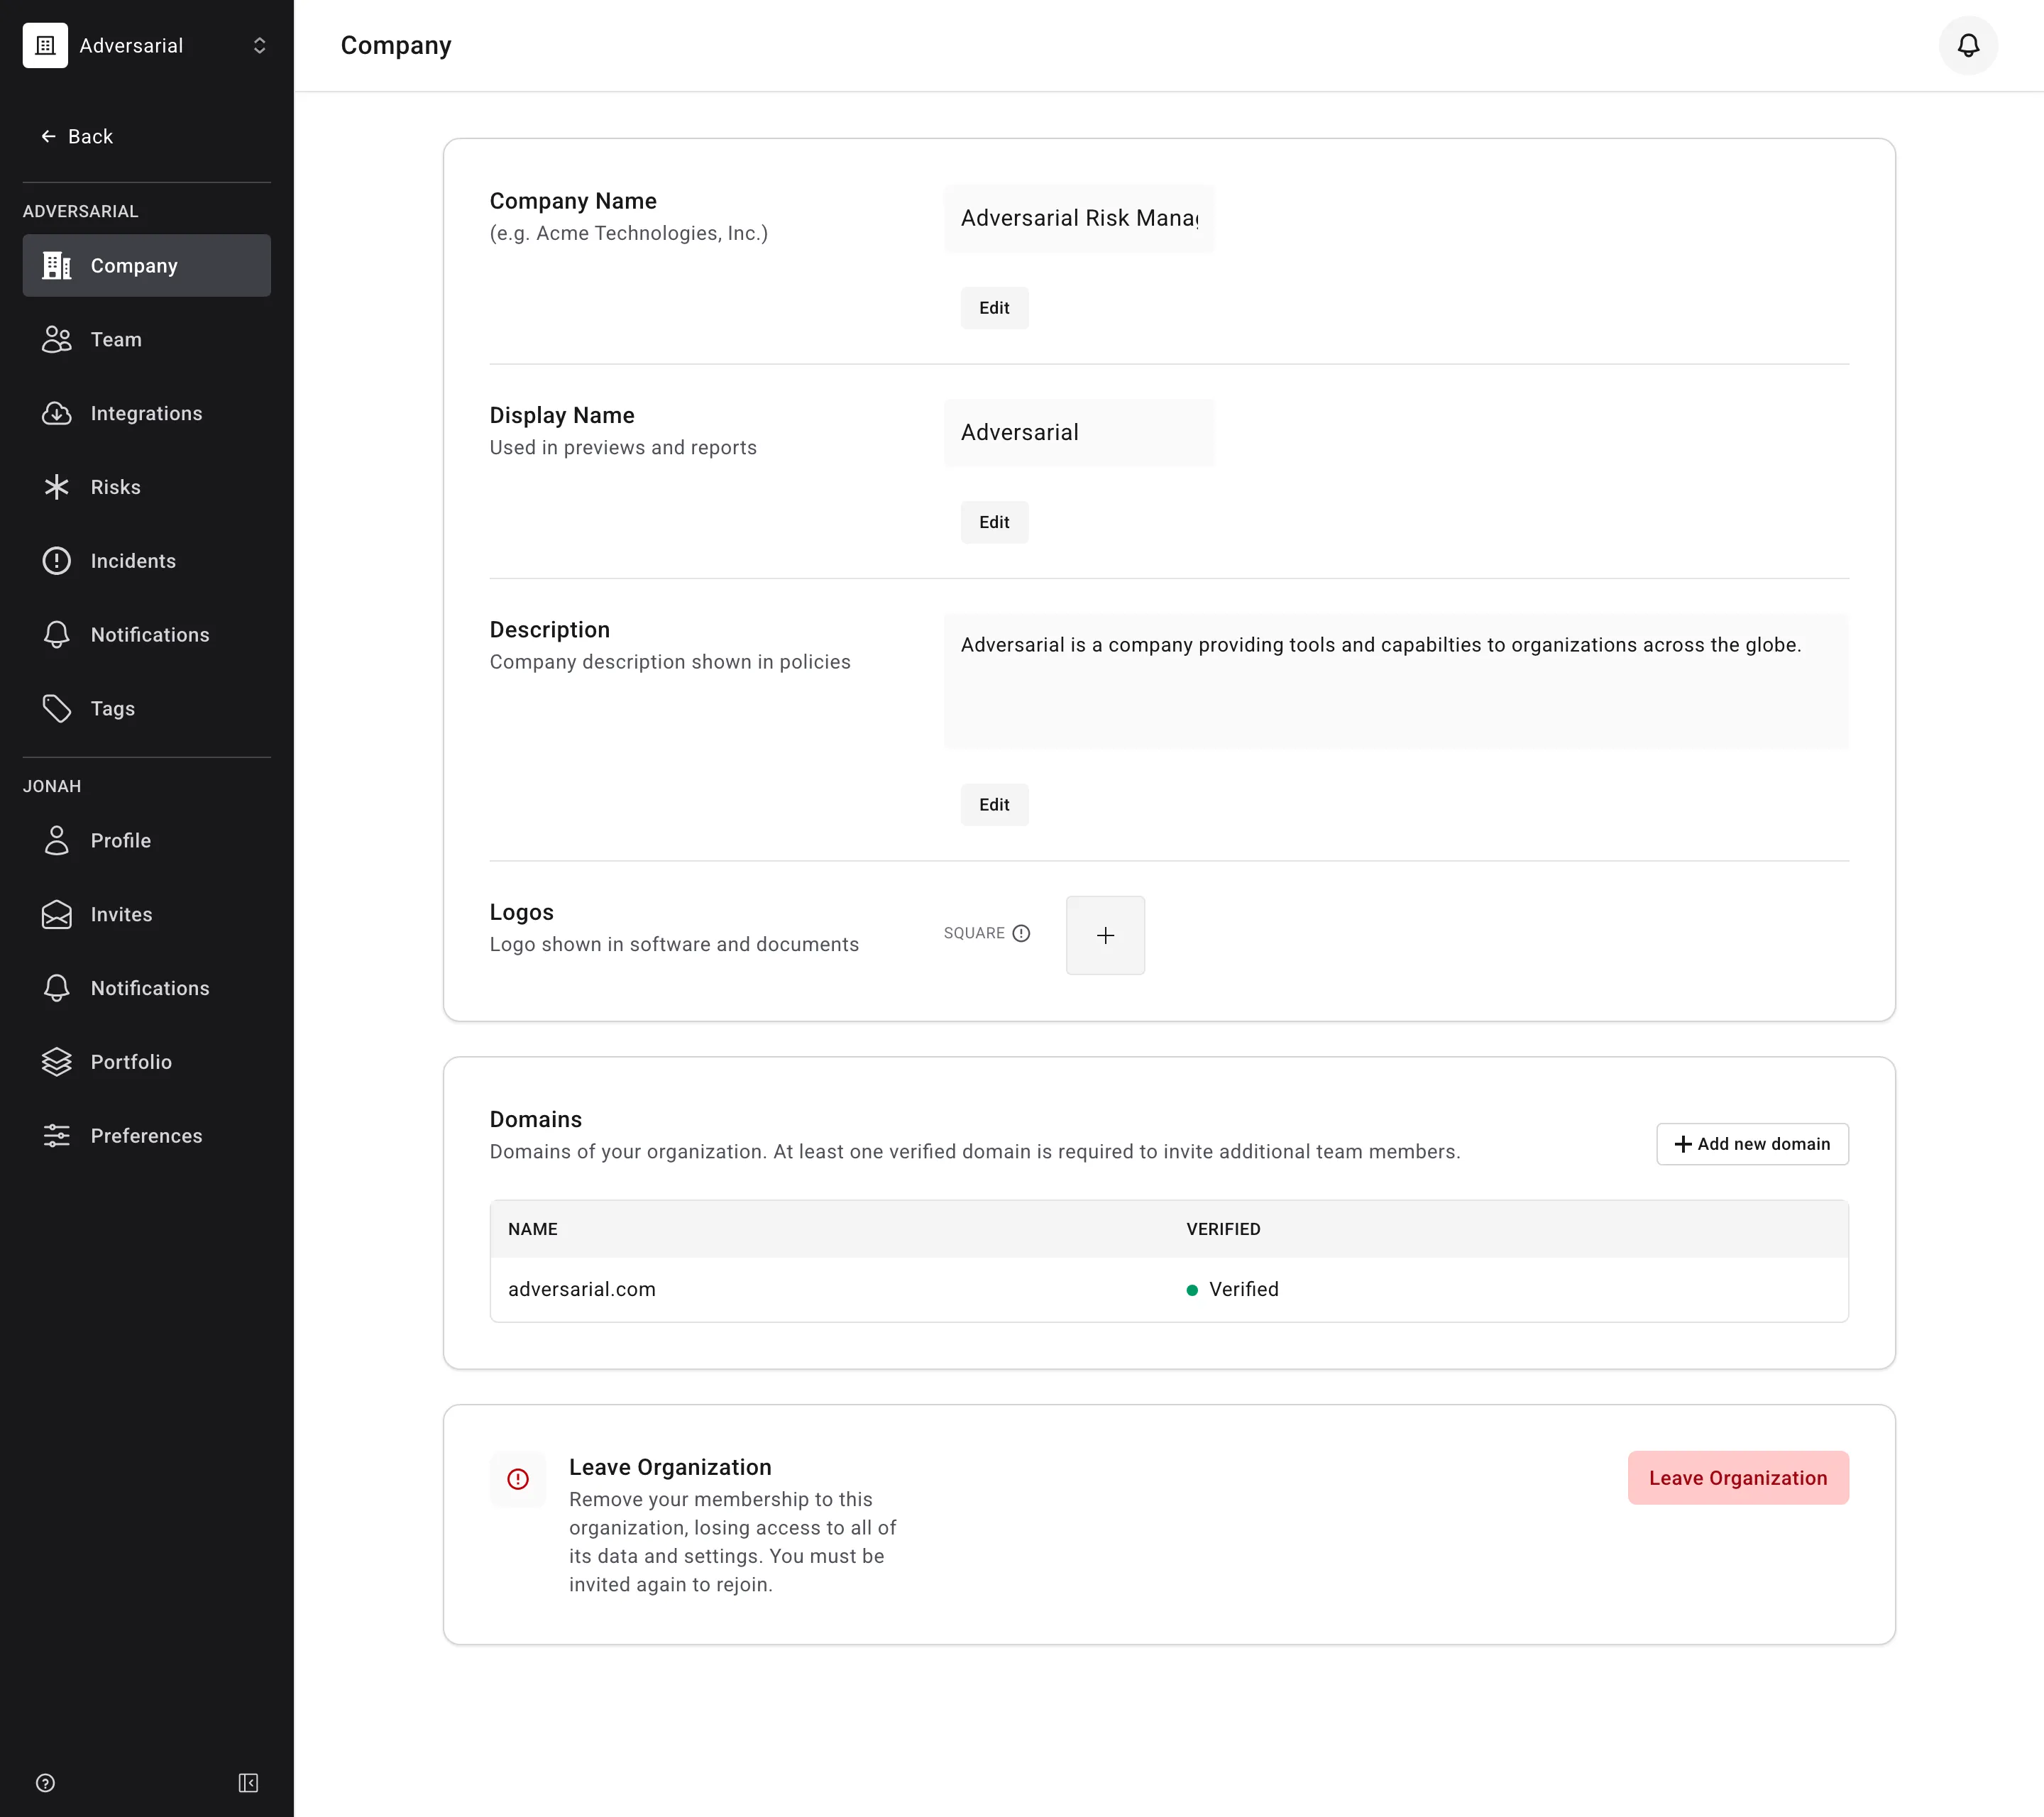
- Set your Company Name and Display Name. These names appear on platform dashboards, email alerts, and exported governance reports.
- Provide a Description summarizing your business model and operational scope (used to calibrate automated policies and AI scoring context).
- Upload your organization’s square Logo.
- Confirm your organization’s domain under Domains. At least one verified domain is required to invite team members.
3. Invite your team
Section titled “3. Invite your team”Navigate to Settings > Team in the sidebar to manage organization members.
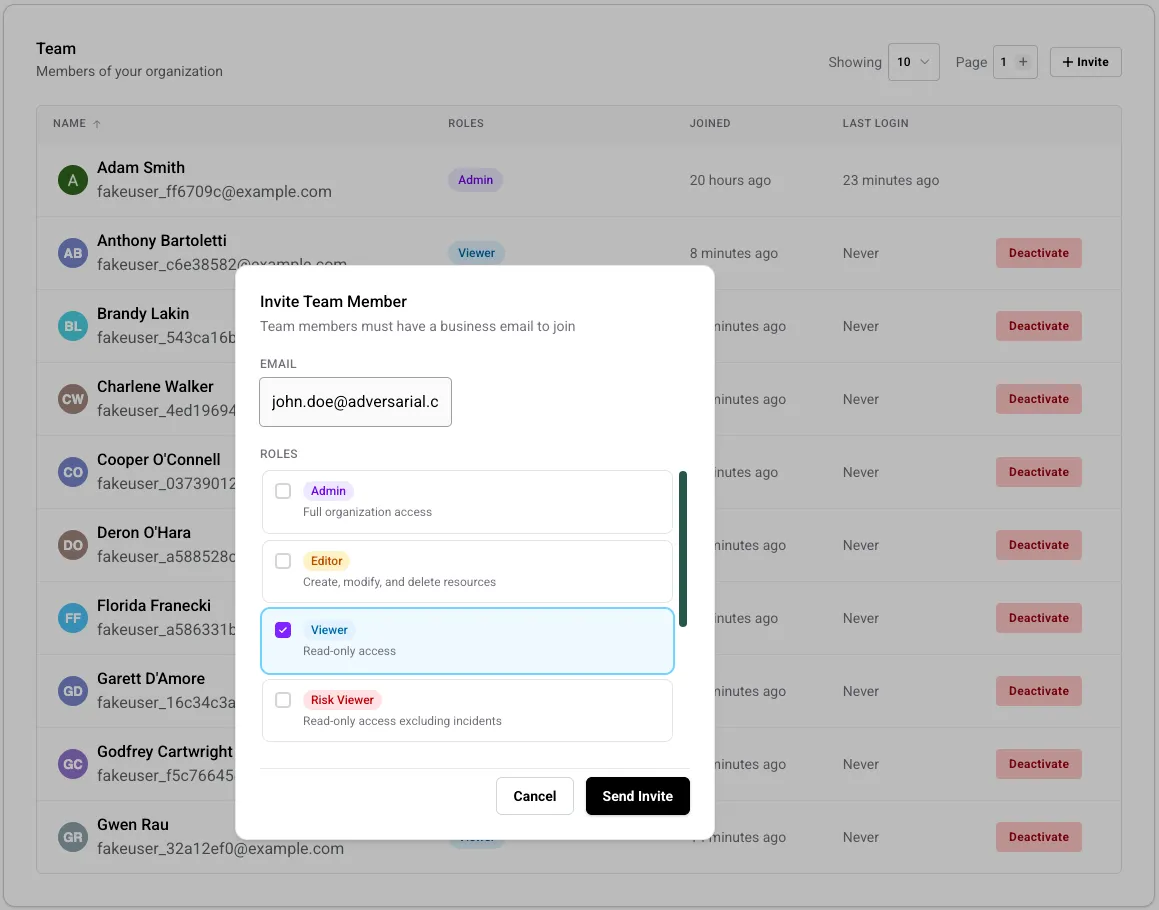
- Click + Invite in the upper-right corner of the Team page.
- Enter the email address of the team member you want to add.
- Assign one or more roles based on the user’s responsibilities, such as Admin, Editor, or Viewer — see Managing Roles for the full set.
- Click Send Invite. The user will receive an invitation email containing a secure link to join your organization.
4. Configure your Threat Profile
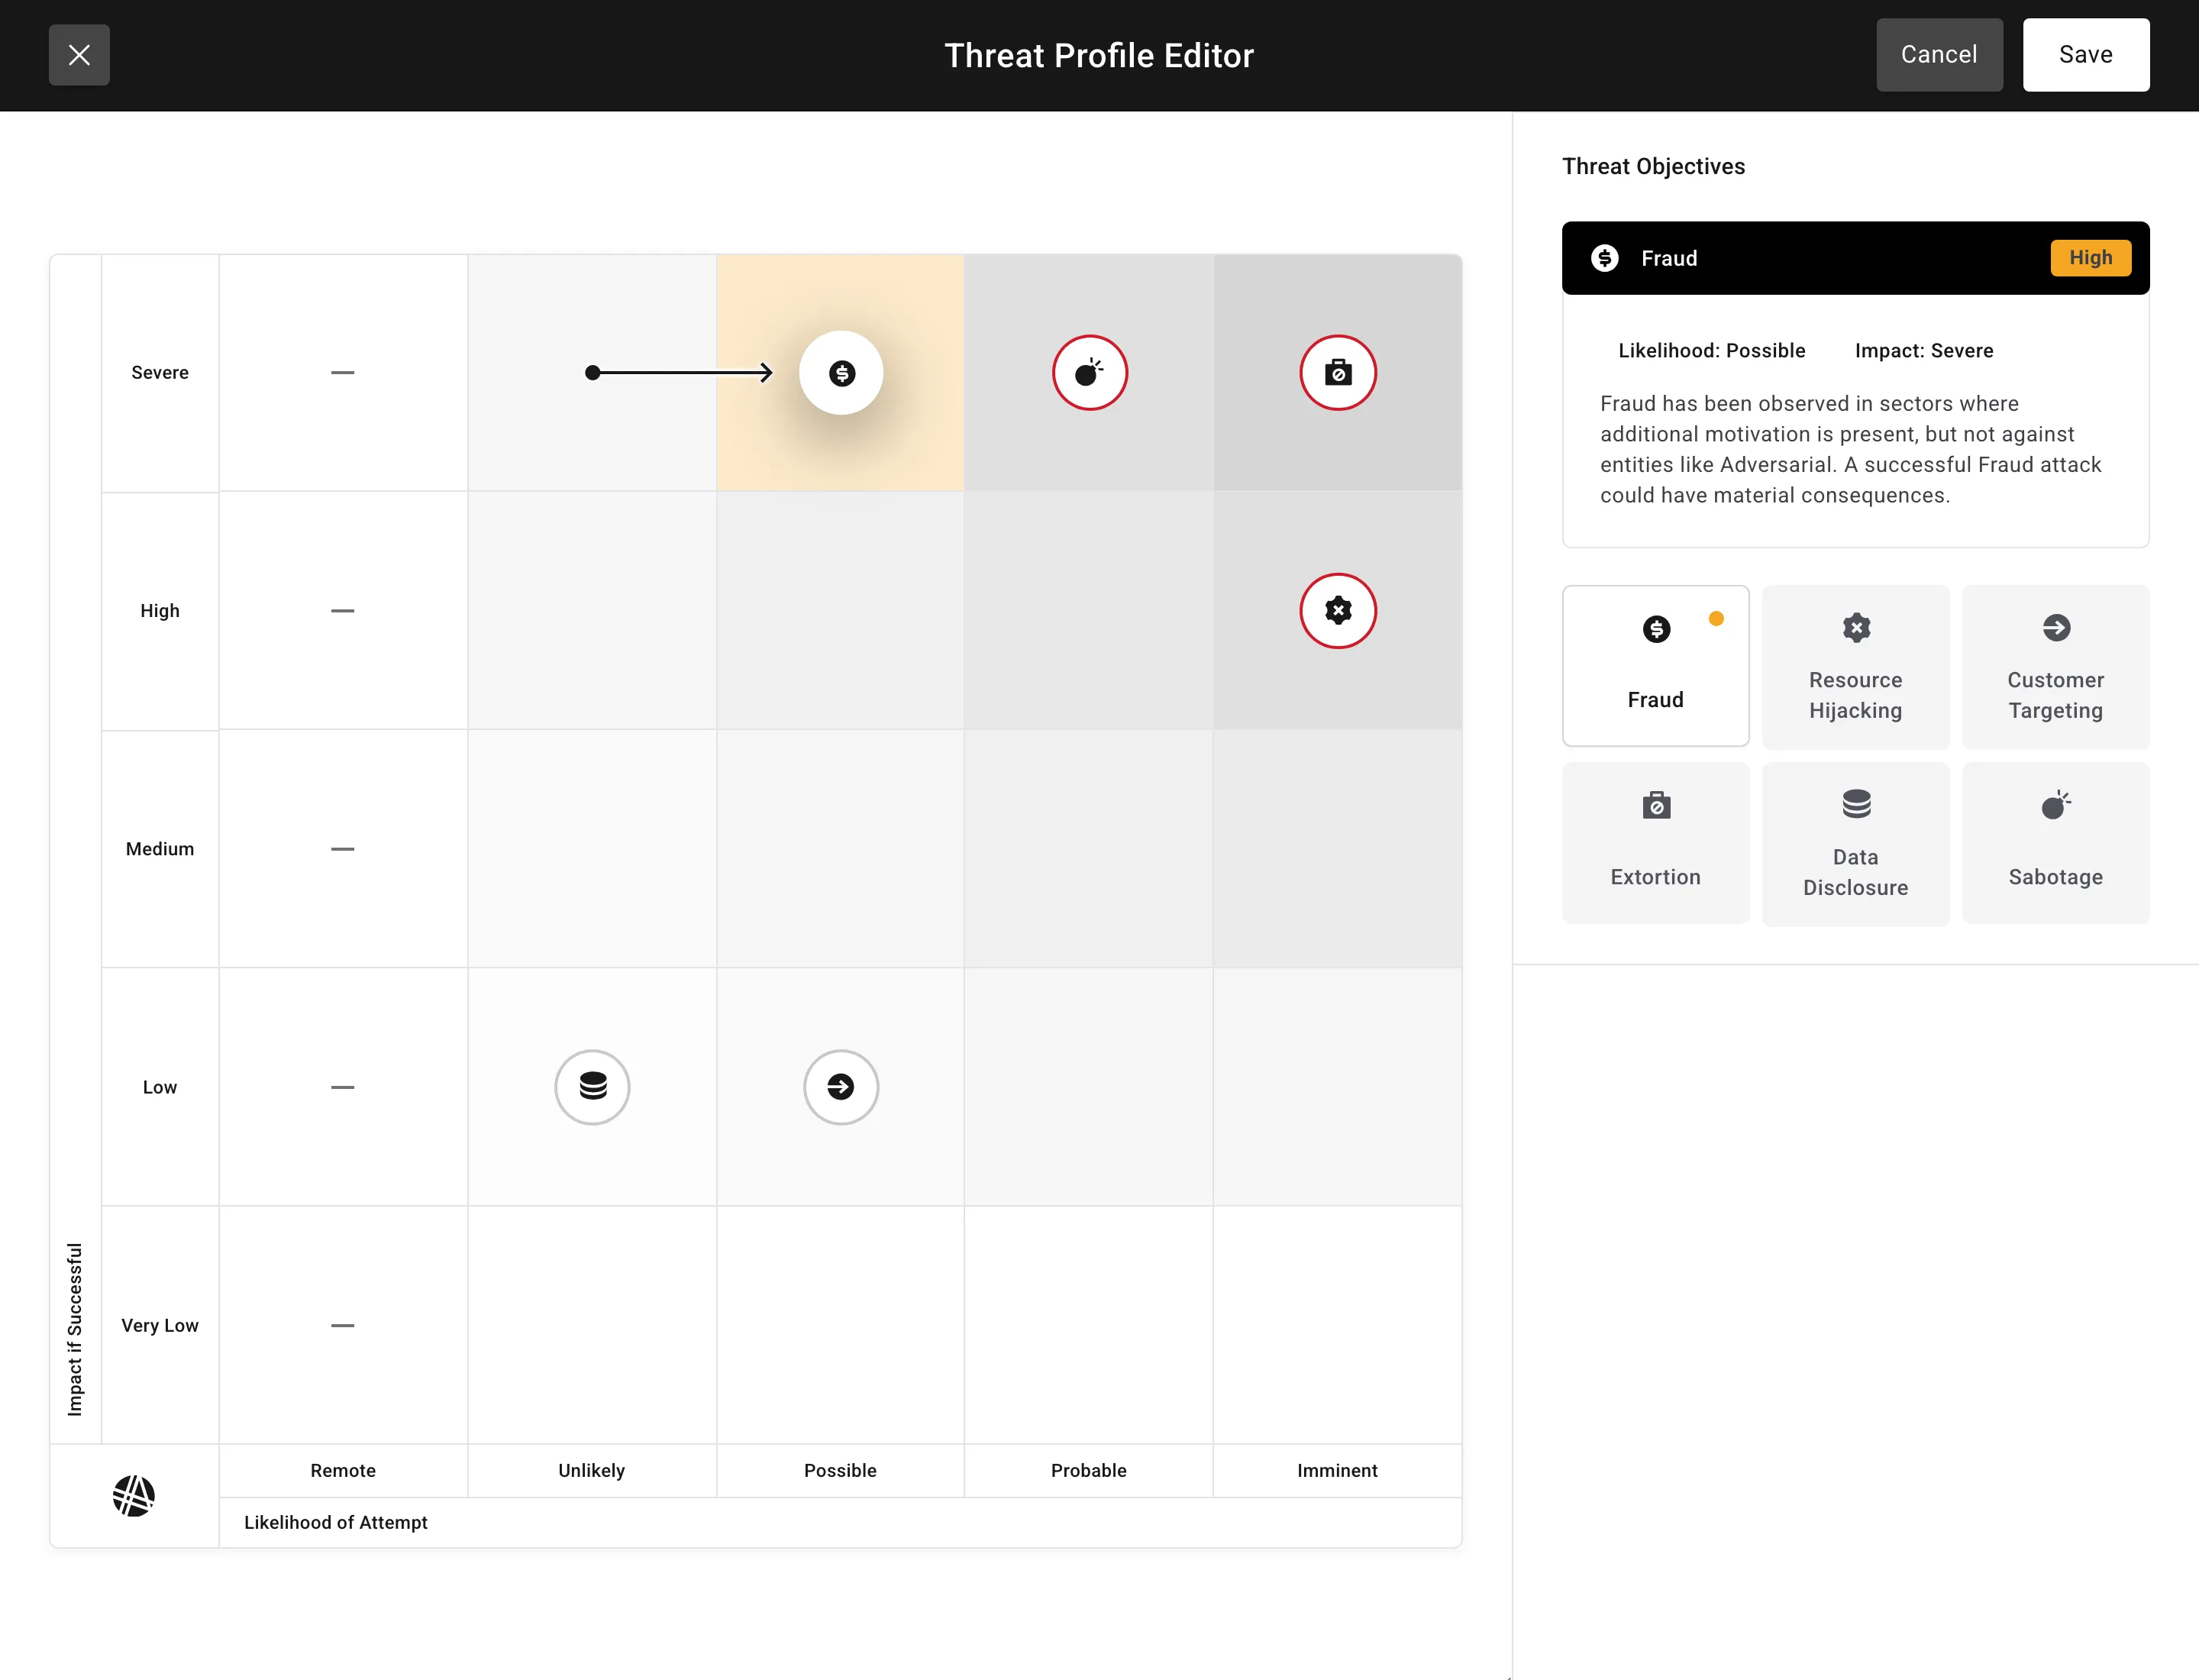
Section titled “4. Configure your Threat Profile”Your Threat Profile establishes your organization’s baseline risk appetite — the threat objectives it defines are assigned to risks and incidents as they are scored and carry through to notifications and governance reports.
- Navigate to Threats in the primary navigation.
- Click Edit Threats in the top right to open the 5x5 heat map editor.
- Drag each of the six Threat Objectives (Fraud, Resource Hijacking, Customer Targeting, Extortion, Data Disclosure, and Sabotage) onto the grid cell that matches its Likelihood of Attempt (Remote through Imminent) and Impact if Successful (Very Low through Severe).
- Review the generated proposal narrative on the right.
- Click Save in the editor header to stage the proposal. Reopen the editor while the proposal is pending — the button reads Review — and click Approve in its header to activate it.
See Configuring Your Threat Profile for complete guidance on threat objective calibration.
5. Generate your first governance report
Section titled “5. Generate your first governance report”Once risks, incidents, and threat profiles are established, generate an executive governance presentation.
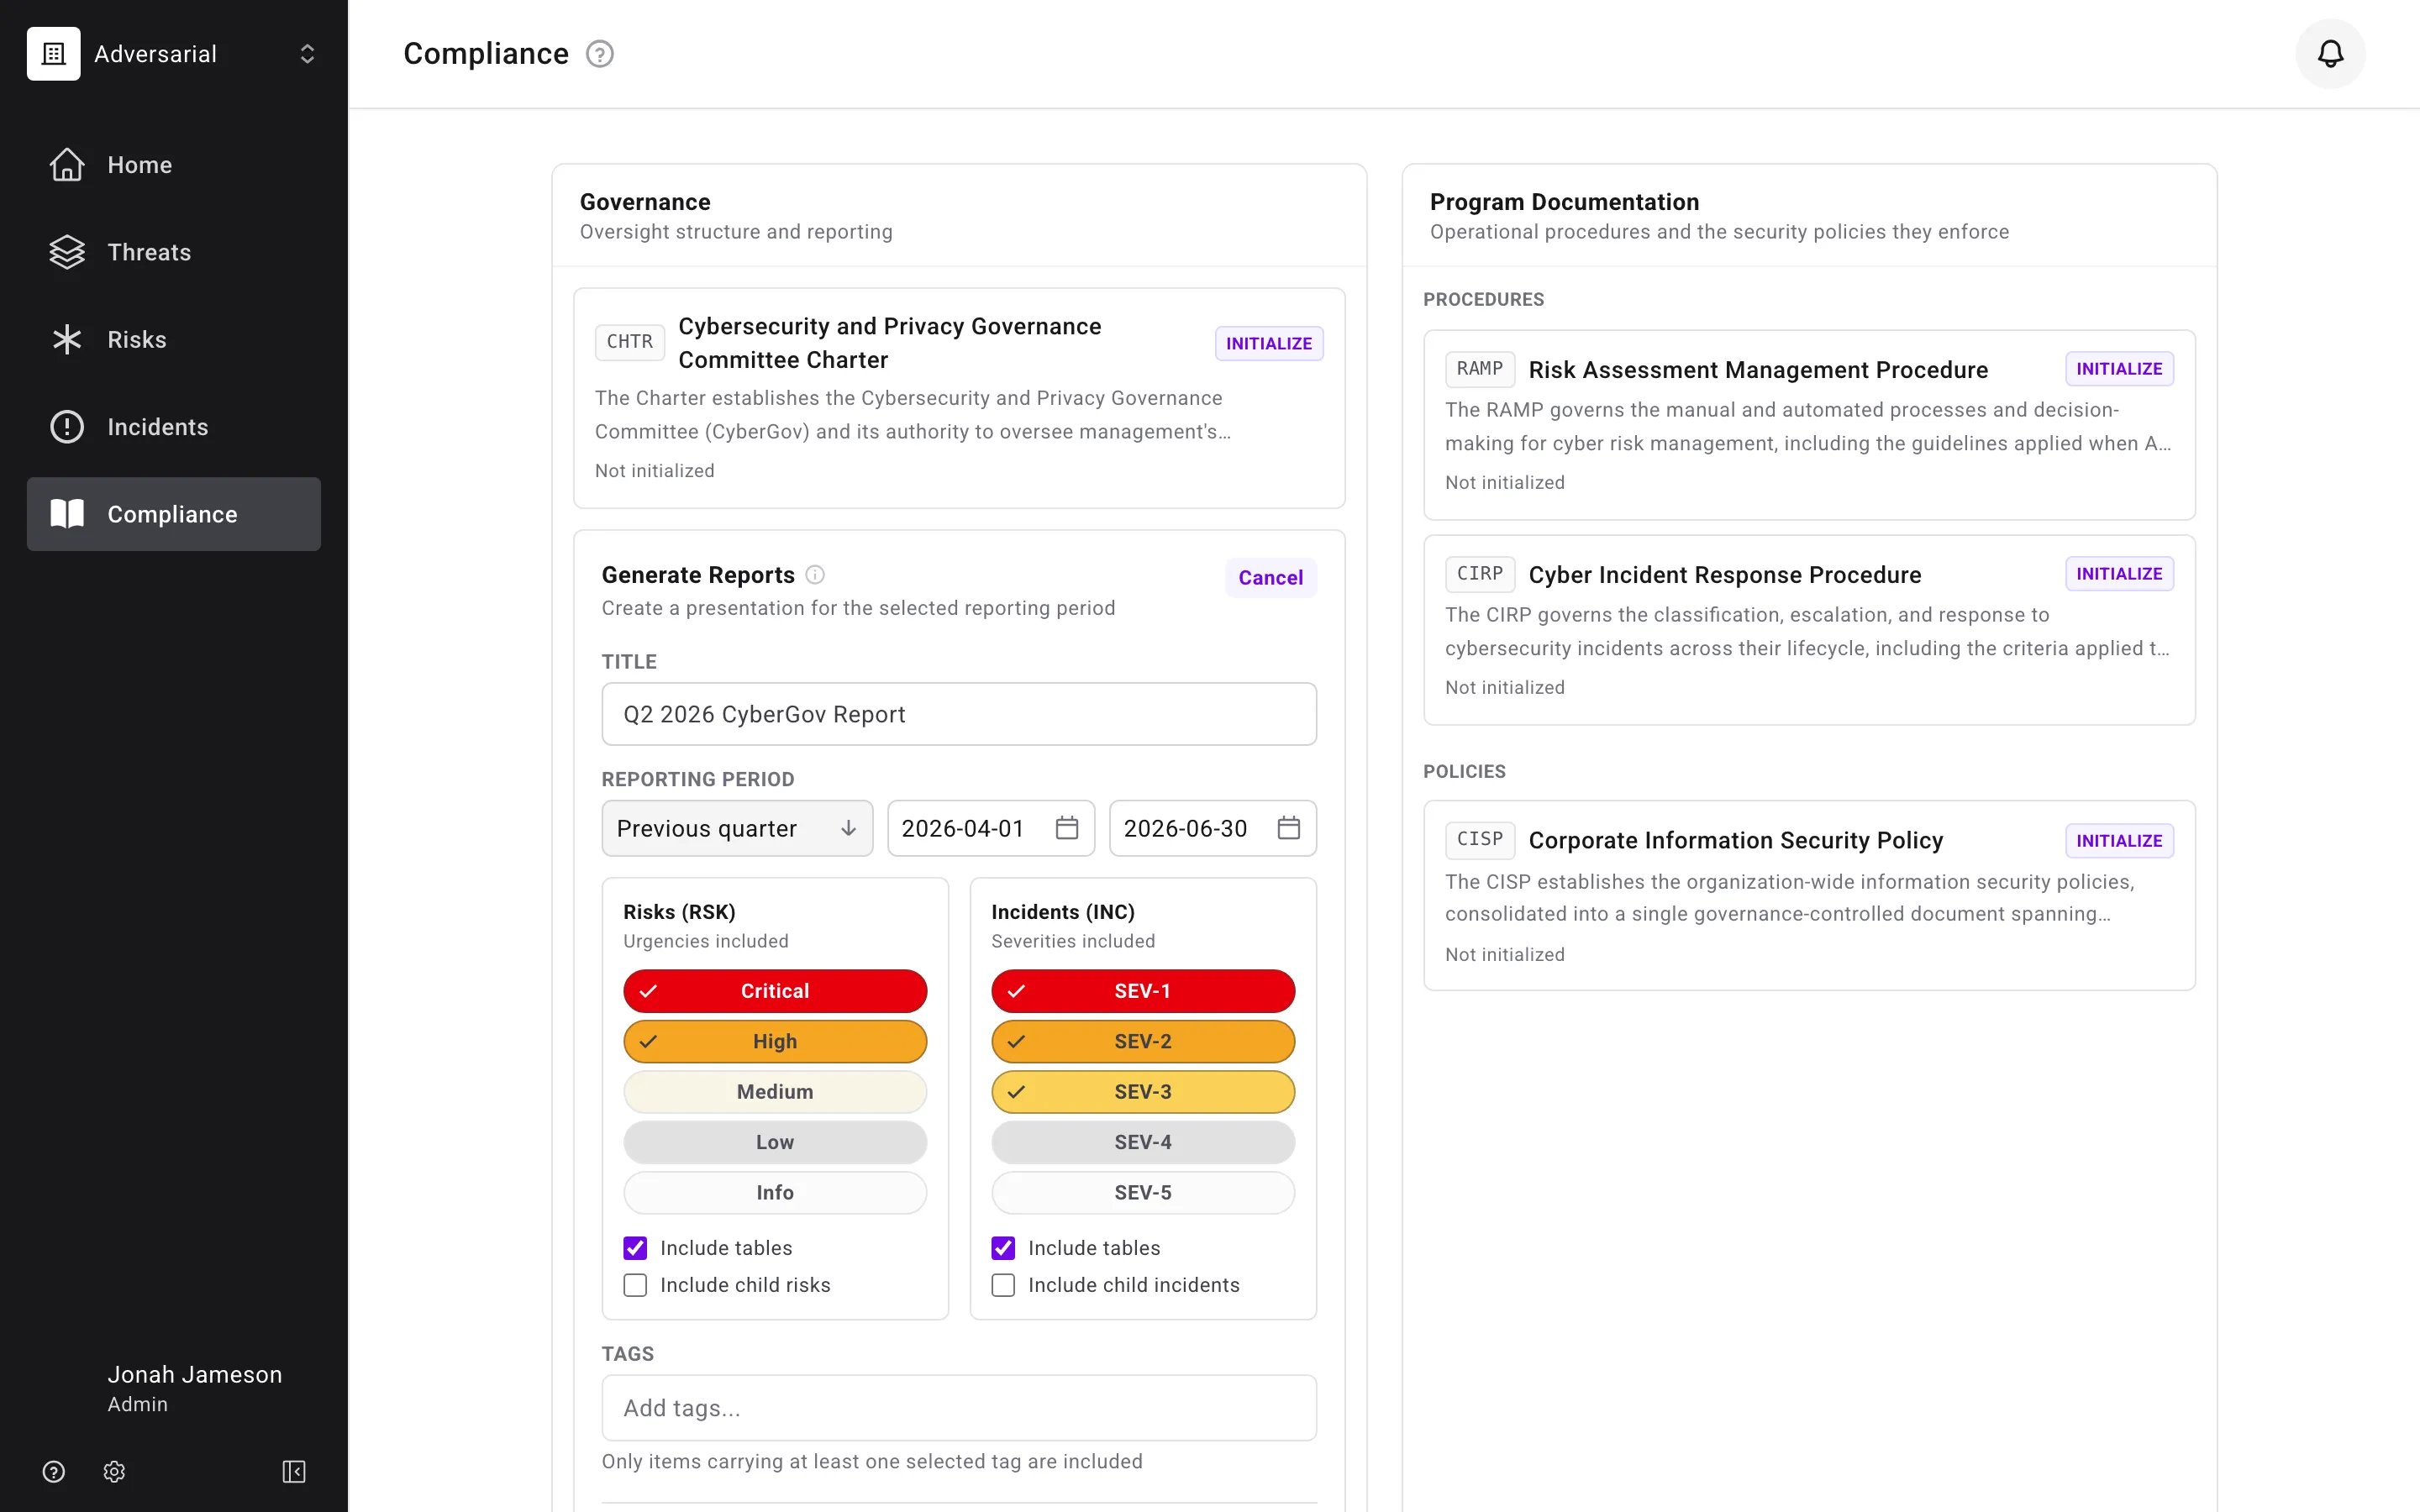
- Navigate to Compliance in the primary navigation.
- Click + New Report to open the report generator drawer.
- Provide a report title and select a Reporting Period (e.g. Previous quarter, Year to date, or a custom date range).
- Select which Risk Urgencies and Incident Severities to include in the report.
- Click Generate Report.
The report generates in the background — a status chip tracks its progress, and the finished file downloads automatically when it’s ready. The platform compiles your organization’s threat posture, active risk distributions, and incident response metrics into an editable PowerPoint presentation (.pptx), and the report also lands on the Generated Reports shelf so you can download it again later. See Governance Reports for more on report contents.