ServiceNow
Overview
Section titled “Overview”The ServiceNow integration lets you create ServiceNow records and link existing ones directly from risks and incidents in Adversarial. A single risk or incident can have one or multiple linked records.
The integration connects to ServiceNow’s Table API over OAuth using the client credentials grant — a machine-to-machine flow that runs without a signed-in user (see ServiceNow’s OAuth client credentials grant for more detail). You choose which record tables the integration operates over (for example, Incident, Request, or a custom table), and it creates, searches, and links records across that set.
Most of the setup happens in ServiceNow, where you create a dedicated service account, grant it access to the tables you want to use, and register an OAuth client. You then enter the resulting credentials in Adversarial.
You will need administrator access to your ServiceNow instance to complete these steps.
1. Create a service account
Section titled “1. Create a service account”Create a dedicated user for the integration so its activity is attributable and its access is scoped to exactly what the integration needs. Do not reuse a person’s account.
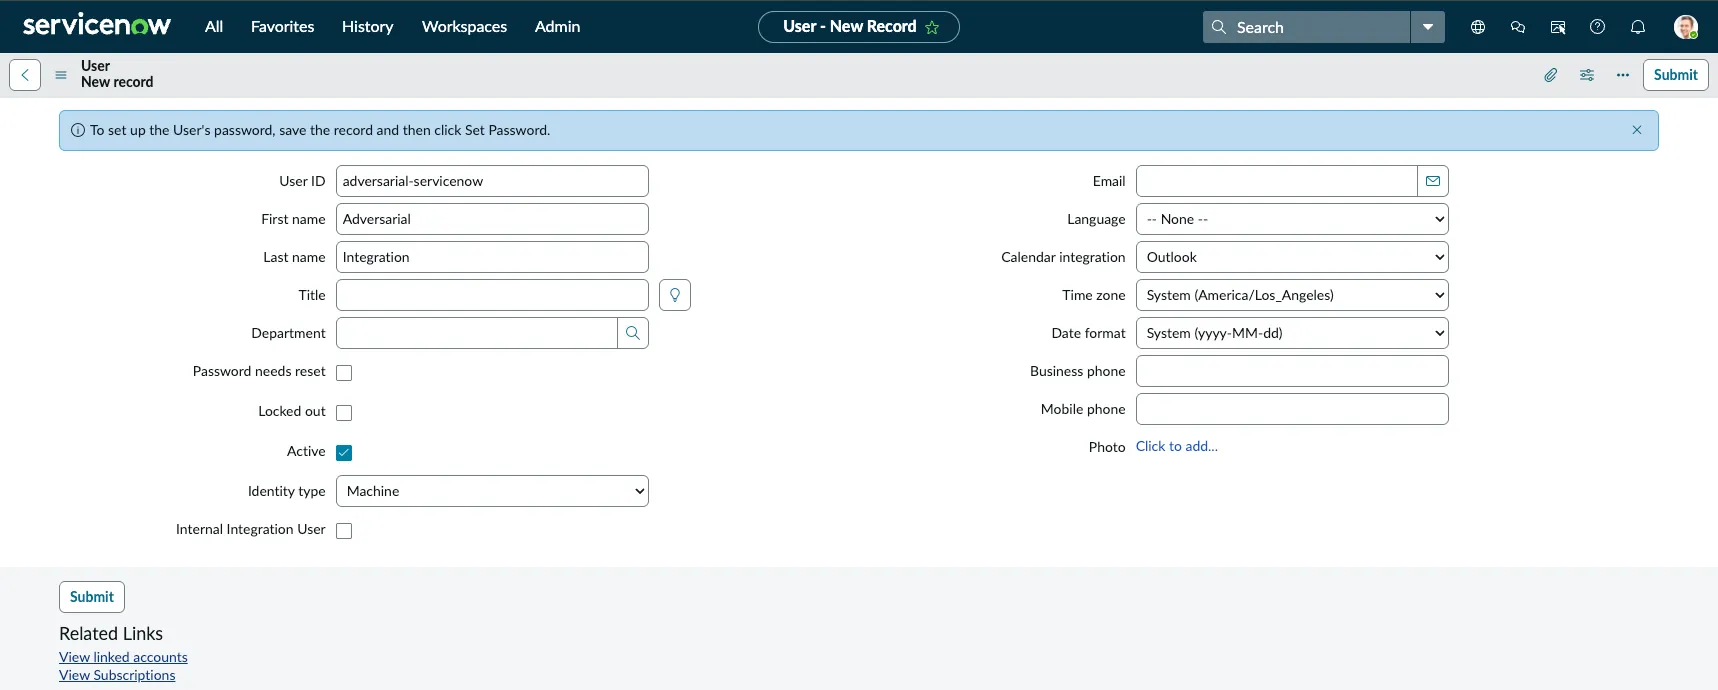
In ServiceNow, create a new User with:
- A recognizable User ID (for example,
adversarial-servicenow) - Identity type set to Machine
- Active checked
2. Create a role and grant table access
Section titled “2. Create a role and grant table access”Create a role that you will assign to the service account, then grant that role read and write access to each table the integration will use. Grant access only to the tables you plan to select in Adversarial — nothing more.
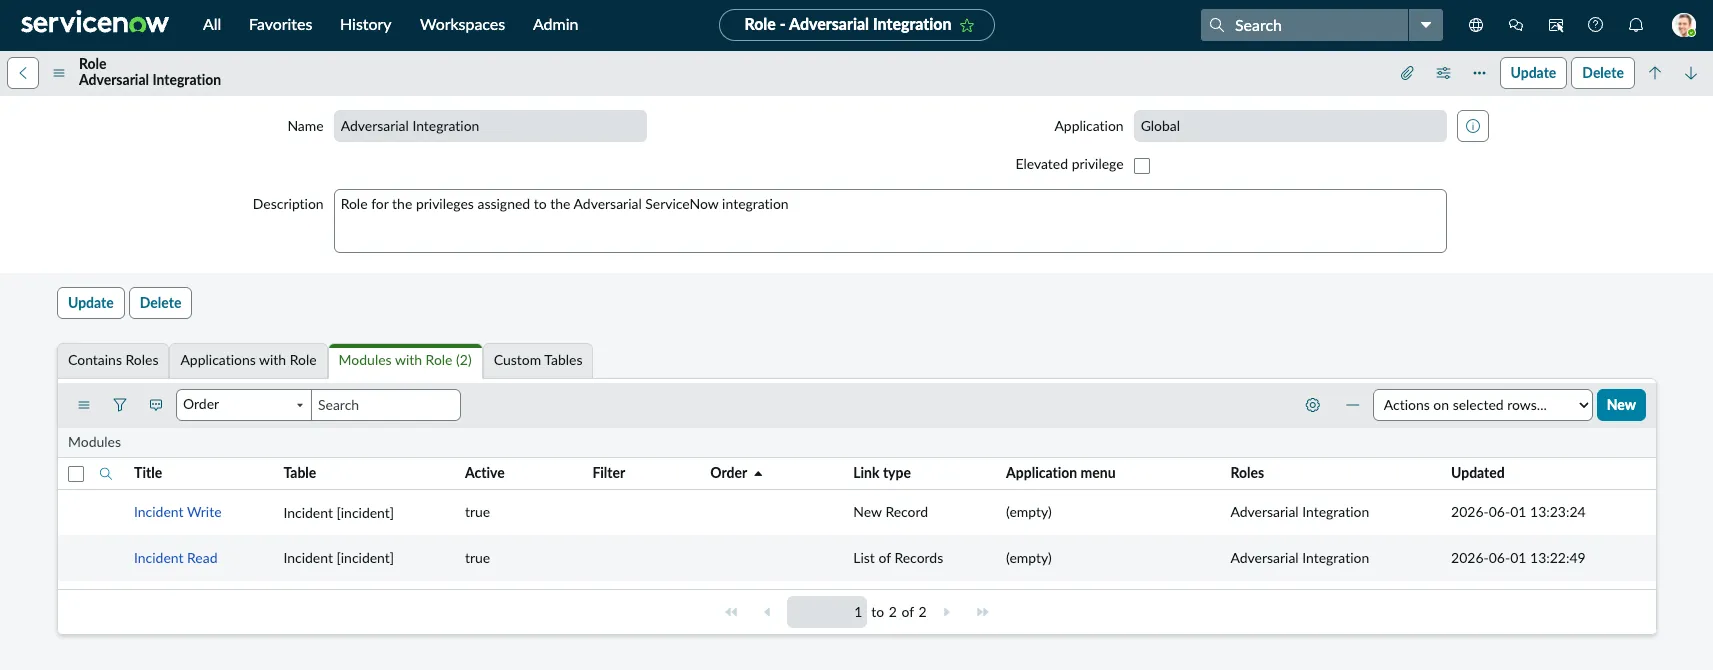
Create a new Role (for example, Adversarial Integration) and leave Elevated privilege unchecked.
For each table you plan to configure in Adversarial, create read and write ACLs on that table and attach them to this role. The integration needs both read access (to search and link existing records) and create access (to file new records). Repeat this for every configured table — an ACL on one table does not extend to another.
Grant the role its table access before you enter the connection details in Adversarial. Saving the configuration checks every table you selected, and the save fails if the service account cannot read one of them. If a save is rejected, verify the role has read and write ACLs on the table in question.
3. Assign the role to the service account
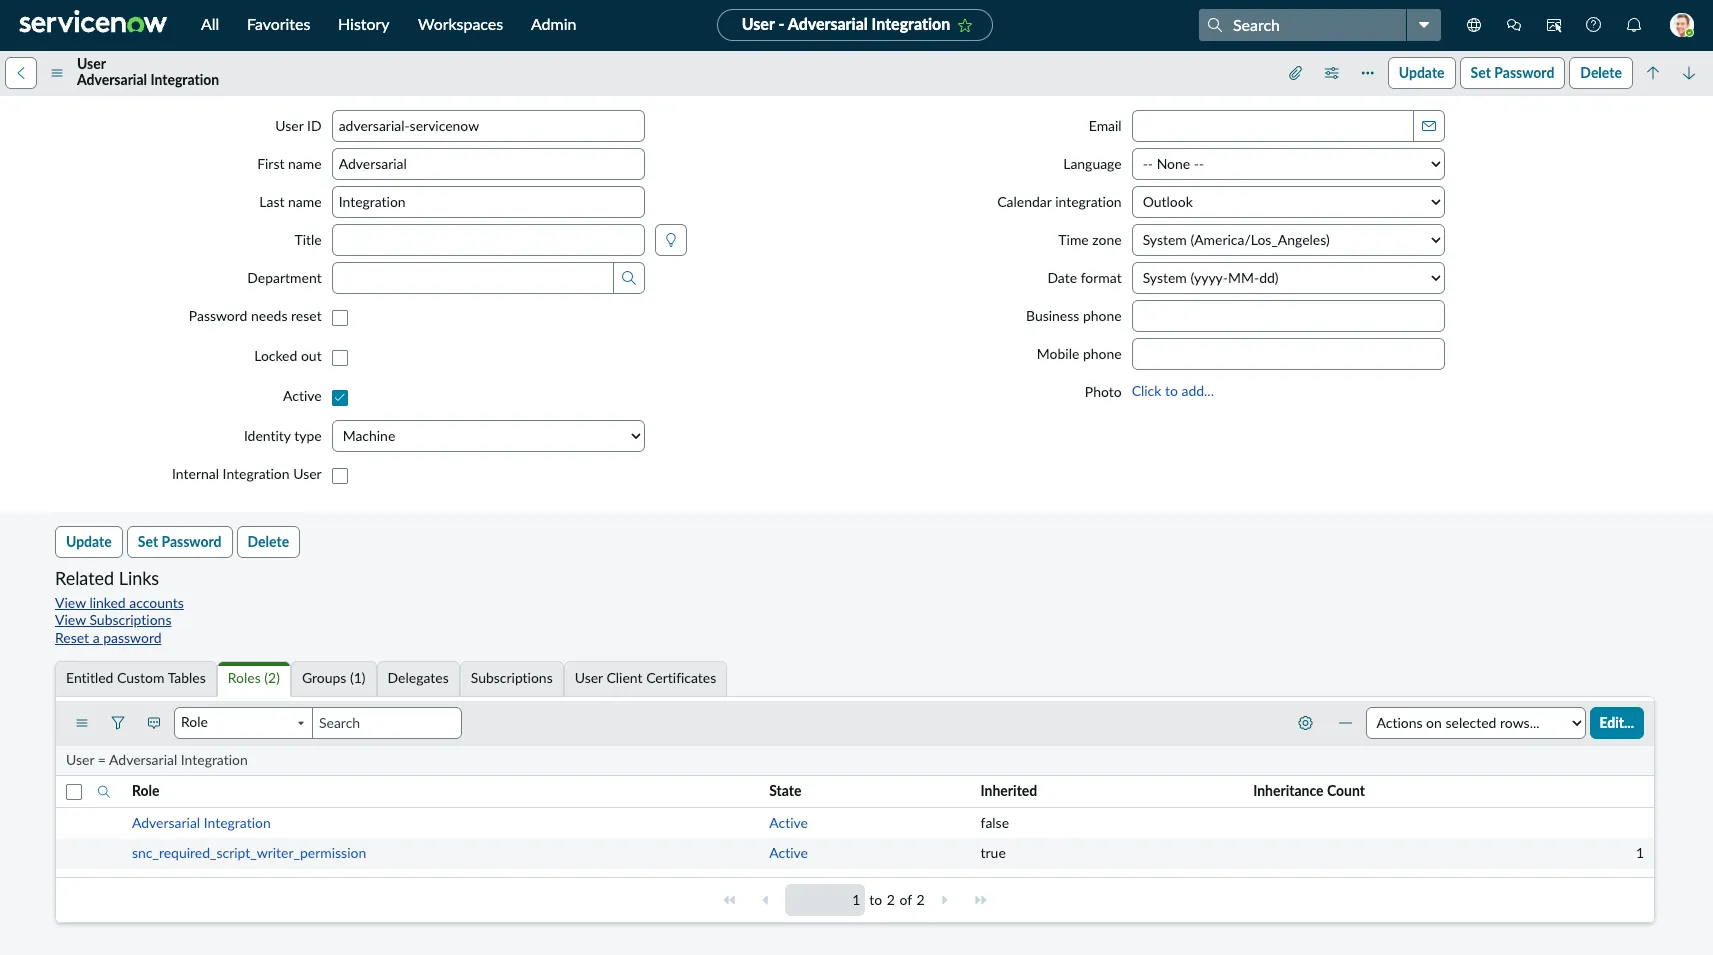
Section titled “3. Assign the role to the service account”Open the service account user from step 1 and assign the role from step 2 under the Roles tab.
4. Register the OAuth client credentials grant
Section titled “4. Register the OAuth client credentials grant”The client credentials grant must be enabled on your instance before you can register a client that uses it. Enabling it is controlled by the glide.oauth.inbound.client.credential.grant_type.enabled system property, which must be set to true. See ServiceNow’s Create the client credentials system property for details.
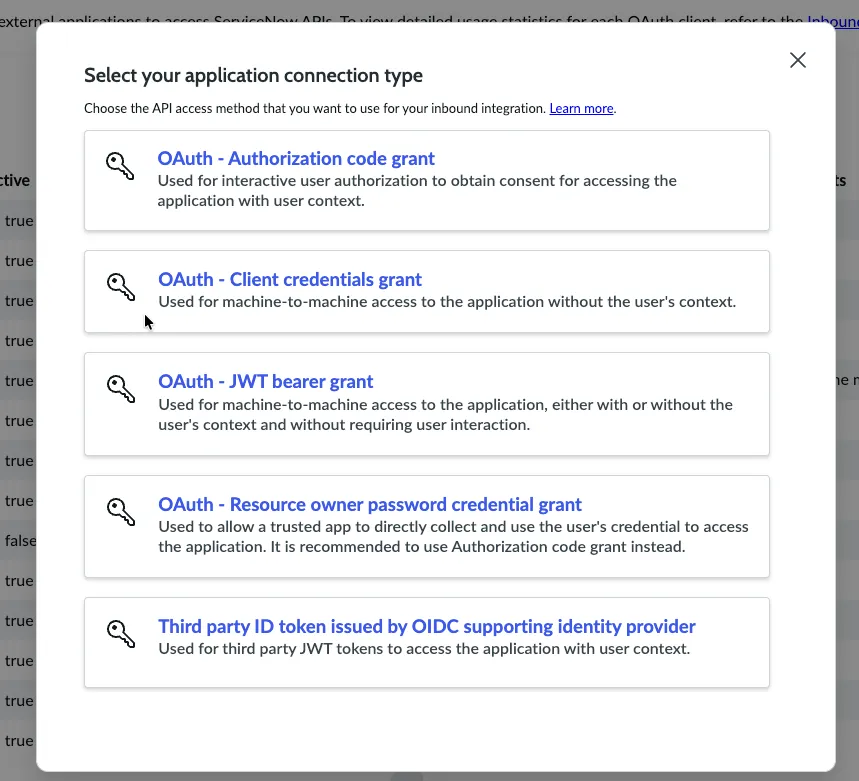
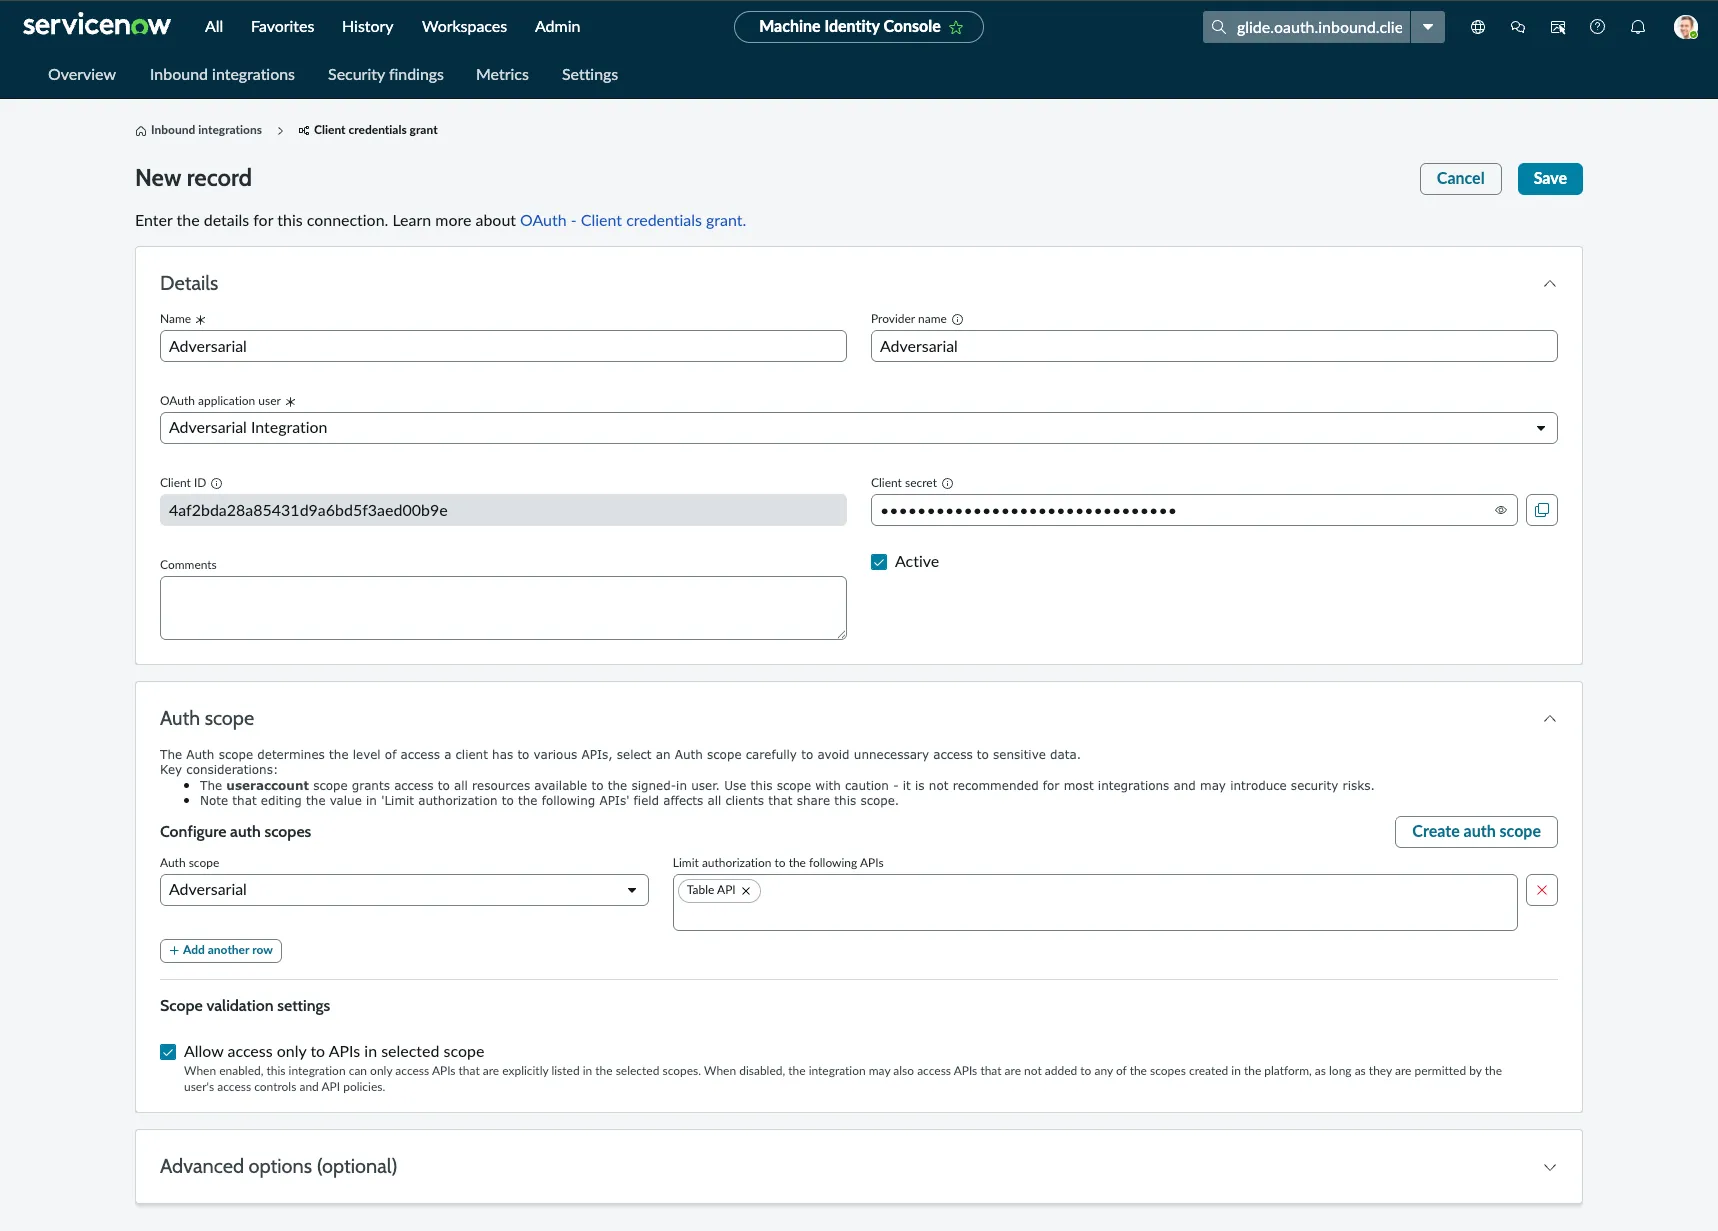
In the Machine Identity Console under Inbound integrations, create a new connection and choose OAuth - Client credentials grant as the application connection type.
On the connection form:
- Give the connection a Name.
- Set the OAuth application user to the service account you created in step 1. This is the user the integration acts as, so it inherits the table access you granted that account.
- Under Auth scope, limit authorization to the Table API so the client can only reach the Table API.
After saving, ServiceNow generates a Client ID and Client secret. Copy both — you will enter them in Adversarial.
5. Enter the connection details in Adversarial
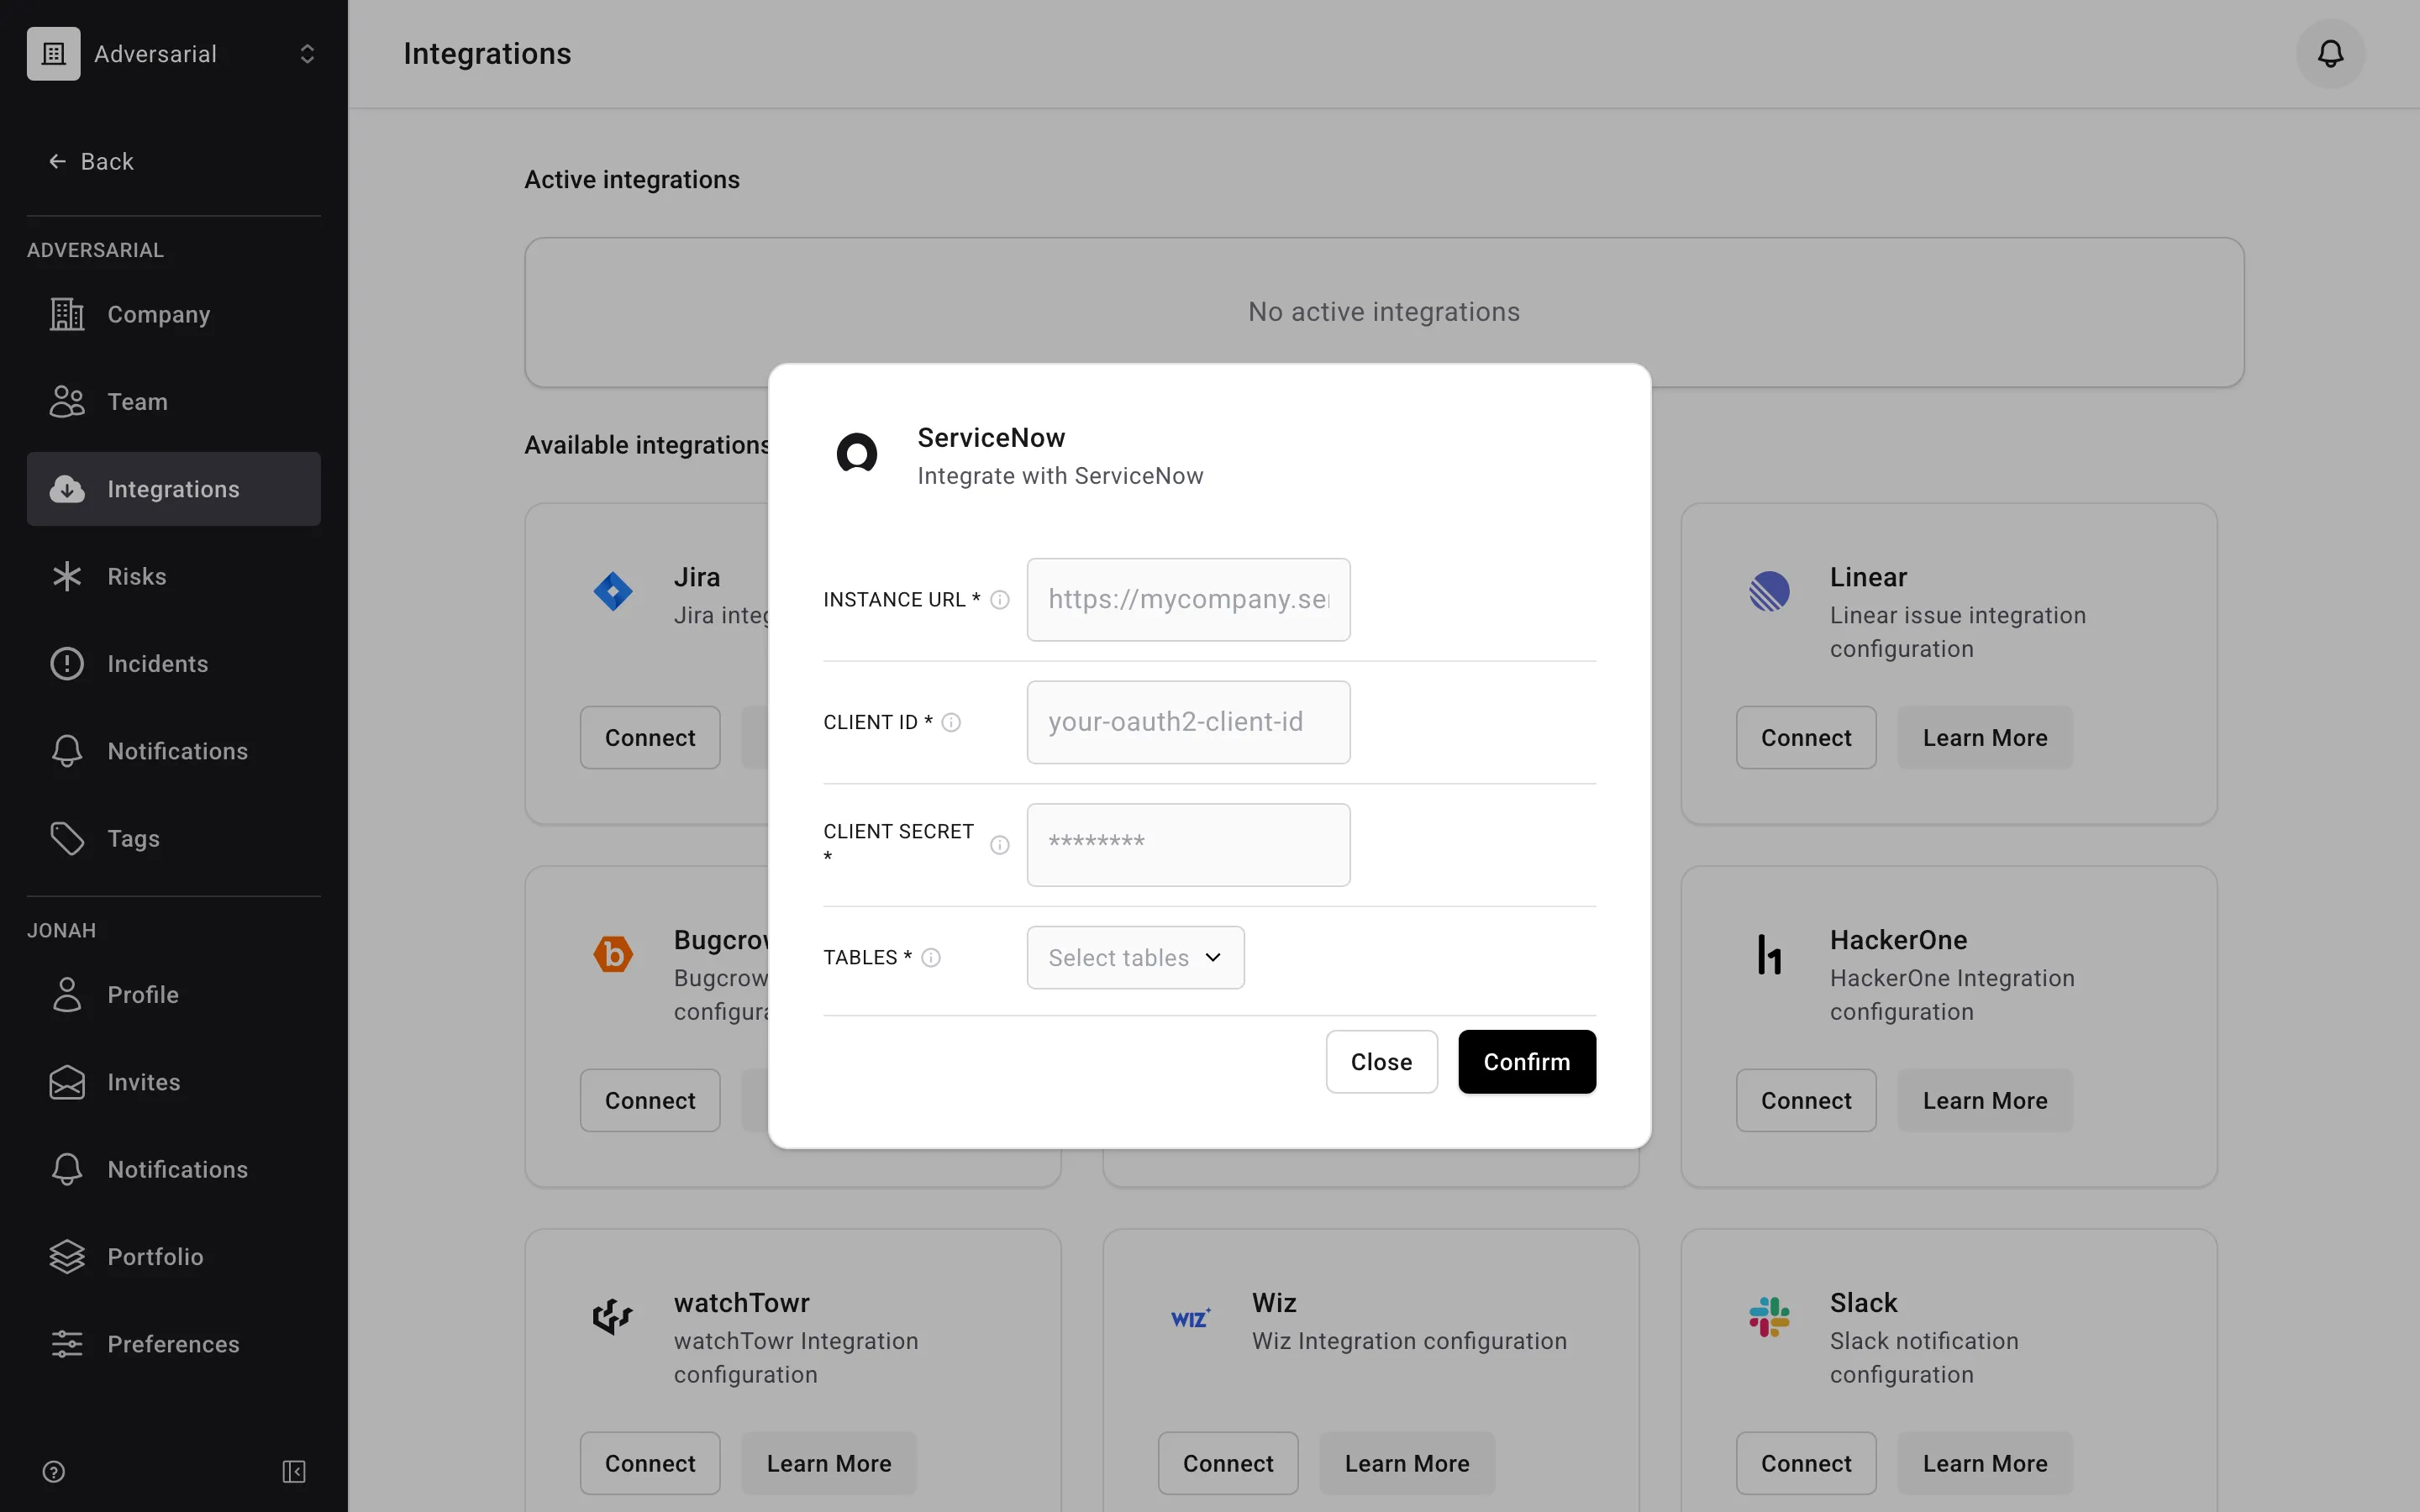
Section titled “5. Enter the connection details in Adversarial”Enable the integration from your Adversarial tenant via Settings > Integrations. Provide:
- Instance URL — your ServiceNow instance’s base URL (for example,
https://mycompany.service-now.com). It must be anhttps://URL on theservice-now.comdomain, with no path after the hostname. - Client ID — from the OAuth client you registered
- Client Secret — from the OAuth client you registered
- Tables — the record tables the integration may create, search, and link across
For Tables, select from the standard tables (Request, Incident, Security Incident, Remediation Task, Problem, Task, Ticket) or type a custom table’s name to add it. The tables you select here must match the tables you granted the role in step 2.
Creating and Linking Records
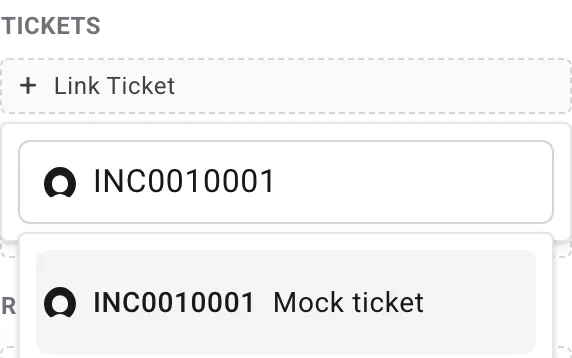
Section titled “Creating and Linking Records”In the Tickets section under Remediation, click + Link Ticket (or + Link ServiceNow ticket when ServiceNow is your only configured ticketing provider) to search for or draft a record.
Linking an Existing Record
Section titled “Linking an Existing Record”Type the record number or summary in the Search ServiceNow input. The search spans all tables configured for your organization. Select the matching record to attach it to the risk or incident.
Creating a New Record
Section titled “Creating a New Record”When searching for a record that does not yet exist, press Enter to create and link a new ticket from the work item. The record is populated directly from the risk or incident:
| ServiceNow field | Populated from |
|---|---|
| Short description | Title |
| Description | Description (falls back to the title when the description is empty) |
| Priority | The risk’s Initially Reported Urgency or the incident’s Severity (see below) |
| Risk Initially Reported Urgency / Incident Severity | ServiceNow Priority |
|---|---|
| Critical / SEV-1 | 1 – Critical |
| High / SEV-2 | 2 – High |
| Medium / SEV-3 | 3 – Medium |
| Low / SEV-4 (or unset) | 4 – Low |
| Info / SEV-5 | 5 – Planning |
Long titles and descriptions are trimmed to ServiceNow’s field length limits.
When more than one table is configured, you choose which table to file the record into at creation time. When only one table is configured, the record is filed into that table directly.
Unlinking
Section titled “Unlinking”Remove a link from the same section. Unlinking removes the link in Adversarial; it does not delete the record in ServiceNow.